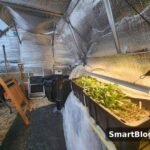
When I started exploring diy greenhouse ideas, I realised that growing under cover does not have to mean spending hundreds of pounds on a ready-made greenhouse. With a few reclaimed materials, some basic tools and a little planning, it is possible to create a useful growing space in a back garden, on a patio or even on an allotment.
Table of Contents
What I particularly like about building a greenhouse yourself is that you can make it fit the space you actually have. A narrow side garden might suit a lean-to, while a small patio could benefit from a compact shelf greenhouse. There is no need to squeeze a standard-sized kit into an awkward corner or pay for features you will never use.
Building your own also gives you more control over the budget. Old windows, timber offcuts, wooden pallets and clear plastic can often be reused rather than bought new. The result might not look like an expensive garden-centre greenhouse, but it can still protect seedlings, extend the growing season and give you a head start on summer vegetables.
In this guide, I am sharing 15 practical projects, including simple weekend builds and more ambitious designs. I have included realistic UK cost estimates, how long each project might take, and the details I would consider before picking up a hammer.
Before You Build: 4 Things to Decide First
Before choosing from these DIY greenhouse ideas, I would spend a little time working out what you need. A greenhouse designed for raising seedlings has different requirements from one intended for growing tomatoes throughout summer.
1. Find the Best Position for Sunlight
Light is one of the most important considerations. Most vegetables and seedlings benefit from a bright position, although plants can suffer if a small enclosed structure becomes excessively hot in direct sunshine.
Watch your garden at different times of the day. Notice where the sunlight falls in spring and summer, and check whether nearby fences, walls or trees cast long shadows. A sunny, sheltered spot is usually a good starting point.
In the UK, protection from strong winds and heavy rain is useful, but do not put your greenhouse in such a sheltered, shaded corner that plants struggle to grow. Leave enough room around the structure for maintenance and ventilation.
2. Measure the Space Properly
Measure the available width, length and height before selecting a design. Remember to allow room for the door to open, space to walk around the structure and somewhere to stand when watering plants.
For a patio, a narrow shelving unit might be all you need. For an allotment, a small polytunnel or hoop house may be more practical.
Think about future access, too. You might begin with seed trays, but larger tomato plants will eventually need more headroom.
3. Choose Materials for Your Weather
Reclaimed timber is useful for frames, while PVC pipes can make curved supports for lightweight covers. Old windows allow plenty of light into a structure, but glass is heavy and can break. Handle reclaimed panes carefully and avoid using damaged glass.
For plastic-covered designs, choose a suitable UV-resistant greenhouse covering rather than assuming any clear sheet will last outdoors. Secure the covering properly and inspect it regularly.
4. Set a Realistic Budget
Decide what you are happy to spend before buying materials. My preferred approach is to list what I already own, check what can be reclaimed and then buy only the missing essentials.
A simple cold frame might cost less than £20, while a larger timber-and-window greenhouse could cost well over £100. Allow a little extra for fixings, hinges, replacement covering and repairs.
The estimates below assume you already have basic tools and can reuse some materials where appropriate. Delivery, paid labour and new tool purchases may increase the total.
15 DIY Greenhouse Ideas That Actually Work
1. Build a Hoop House from PVC Pipes
A PVC hoop house is one of the simplest DIY greenhouse ideas for protecting vegetable beds. Flexible pipes form curved hoops over the growing area, while greenhouse plastic creates the covering.
I would start by measuring the bed and spacing the hoops evenly. The pipes need secure fixing at ground level, and the plastic must be fastened firmly enough to resist ordinary gusts without tearing. Use suitable anchors for your soil and avoid making the structure taller or wider than its supports can safely manage.
Leave an opening at each end so that you can reach the plants and let excess heat escape. On warm spring days, ventilation becomes especially important.
Estimated cost: £35–£90
Build time: Around one day
Best for: Seedlings, salad leaves and early vegetables.
2. Turn Wooden Pallets into a Greenhouse
If you can obtain sound, suitable pallets, they can provide an inexpensive framework for a small greenhouse. I would use them to create a sturdy base and low walls, then add a lightweight timber roof frame covered with appropriate clear greenhouse panels or film.
Check the condition of the timber first. Reject rotten, split or heavily contaminated wood, and avoid pallets that may have been exposed to unknown chemicals. Reclaimed material should be clean and suitable for garden use.
One useful feature of a pallet greenhouse is the solid lower section, which can make the interior feel less exposed. However, too much timber can block valuable light, so keep the upper walls and roof as transparent as practical.
Estimated cost: £30–£100
Build time: One to two days
Best for: Budget-conscious gardeners with basic carpentry skills.
3. Build an Old-Window Greenhouse
Old-window greenhouses have a character that is difficult to reproduce with modern plastic structures. Reclaimed frames can be arranged around a timber structure, creating a charming place to raise plants and grow summer crops.
I would collect windows of compatible sizes before designing the frame. Build around the actual dimensions rather than assuming reclaimed windows will fit together neatly. Any gaps need attention, and the roof must shed rain rather than collect it.
Safety deserves particular care here. Old glass can be brittle, so damaged panes should not be used. Make sure frames are supported securely, and use suitable safety glazing where appropriate.
This is a more involved project than a basic hoop house, but it can be rewarding if you enjoy reclaiming materials.
Estimated cost: £50–£200
Build time: Two to three days
Best for: Gardeners wanting a permanent, traditional-looking structure.
4. Make a Cold Frame from a Single Window
A cold frame is a brilliant starting project if you want greenhouse protection without building a full enclosure. All you need is a sturdy, shallow box and a suitable window that works as the lid.
The box can be made from untreated or appropriately treated timber suitable for the job. Position the window so it opens easily, and make sure it cannot slam shut unexpectedly. A simple stay or safe support will help when you are tending plants.
I would use this design to harden off seedlings, protect young salad leaves and get certain crops started earlier in the season. It will not provide the headroom of a greenhouse, but it is inexpensive, compact and practical.
Estimated cost: £10–£45
Build time: Two to four hours
Best for: Small gardens, seedlings and early spring growing.
5. Create a Lean-To Greenhouse Against a Wall
A lean-to greenhouse makes efficient use of space because one side sits against an existing wall. It can be particularly useful in a narrow garden where a freestanding structure would get in the way.
Choose a suitable wall with enough sunlight, then design the frame to match the available width and height. Use a sloping roof so rain runs off, and select fixings suitable for the wall and structure.
A wall can offer some shelter from wind and may reduce heat loss, although it does not guarantee frost protection. Pay attention to drainage, moisture and ventilation, especially in a sunny position.
I would keep the layout simple, with shelving for seedlings and enough room to water plants comfortably.
Estimated cost: £60–£180
Build time: One to two days
Best for: Narrow gardens, courtyards and sheltered growing spaces.
6. Make a Mini Greenhouse from Plastic Bottles
Clear plastic bottles can be reused to create individual plant covers or a small protective structure. This is one of the cheapest projects, especially if you already have suitable bottles at home.
For individual plants, clean the bottle thoroughly and remove any label that significantly blocks light. Carefully prepare an opening that allows you to place the cover over a plant without crushing its leaves. Keep the top open or remove the cap when necessary to provide airflow.
For a larger project, bottles can form part of a lightweight frame, but making a durable, weatherproof structure from them takes considerably more work than it first appears.
I would treat bottle covers as seasonal aids rather than permanent greenhouses. Remove them if plants become too hot.
Estimated cost: £0–£15
Build time: One to two hours
Best for: Experiments, young plants and reuse projects.
7. Build a Simple A-Frame Greenhouse
An A-frame greenhouse has two sloping sides that meet along a ridge. This shape is straightforward to understand, relatively easy to cover and useful for a small vegetable plot.
Build a stable frame using suitable timber, then cover it with greenhouse film or transparent panels designed for outdoor use. Make sure the bottom edges are anchored securely and that rain can drain away from the structure.
One advantage is that the sloping sides help shed rainwater. The main limitation is headroom: the sides become low quickly, so the growing space may be awkward to use for taller plants.
I would choose this design for seedlings, herbs and compact vegetables rather than expecting it to accommodate large tomato plants comfortably.
Estimated cost: £30–£90
Build time: Half a day to one day
Best for: Small growing areas and straightforward DIY projects.
8. Create a Polytunnel-Style Greenhouse
A homemade polytunnel offers a generous amount of protected growing space without the cost of a rigid greenhouse. It uses curved supports and a continuous greenhouse covering, making it suitable for vegetable beds and allotments.
Start with a level site and a clear plan for the tunnel’s length and width. The frame needs enough strength for the covering, while ground anchors and secure fixings help prevent movement in wind.
Use purpose-made greenhouse film where possible. Thin household plastic is unlikely to offer the same durability and can become brittle in sunlight.
Ventilation is essential, as temperatures inside can climb quickly during a sunny afternoon. I would also leave enough room at each end for access, watering and routine maintenance.
Estimated cost: £60–£180
Build time: Around one day
Best for: Vegetable growers and gardeners who need more space.
9. Add a Cover to a Raised Bed
If you already have raised beds, you may not need a separate greenhouse at all. A simple removable cover can protect the crops you are growing and offer a little extra warmth during cooler weather.
Fit flexible hoops or a suitable lightweight frame across the bed, then attach greenhouse film or horticultural fleece as appropriate. The covering should be secure but easy to lift when you need to weed, water or harvest.
I like this approach because it allows you to protect only the bed that needs attention. You can also remove the cover completely during warm weather.
Remember that fleece and clear plastic behave differently. Plastic traps heat and moisture more readily, so it needs careful ventilation, particularly on bright days.
Estimated cost: £15–£50
Build time: Two to four hours
Best for: Raised-bed vegetables, salad crops and early sowings.
10. Reuse Old Doors for a Greenhouse
Glazed doors can be useful reclaimed materials for a small greenhouse. Their large transparent panels admit plenty of light, while their existing frames can make some parts of construction easier.
Before starting, measure every door and check that the frames are sound. A collection of mismatched doors may look appealing, but joining them securely can be challenging. Build a proper supporting frame rather than relying on the doors to hold the structure together.
The roof deserves particular attention because it must support its covering and drain rainwater safely. Reclaimed doors are not automatically weatherproof, so inspect seals and repair gaps where necessary.
This project takes more planning than a cold frame, but the finished structure can have plenty of personality.
Estimated cost: £50–£180
Build time: One to two days
Best for: Reclaimed-material projects and larger gardens.
11. Build a Mini Shelf Greenhouse for a Patio
A compact shelving greenhouse is ideal when space is limited. A metal or timber shelving unit sits inside a clear protective cover, creating several levels for pots, seed trays and small plants.
You can buy a basic frame or adapt a suitable existing shelf unit. Make sure it is stable, rated for the weight of wet compost and securely positioned. A cover designed for greenhouse use will generally be a better choice than thin, improvised plastic.
I would put heavier pots on the lower shelves and use the upper levels for lightweight seed trays. Keep the unit somewhere bright, but watch the temperature on sunny days.
This arrangement will not suit large crops, yet it is a sensible option for balconies, patios and gardeners who mainly want to raise plants from seed.
Estimated cost: £20–£60
Build time: One to two hours
Best for: Patios, balconies and small collections of seedlings.
12. Try a Basic Geodesic Dome
A geodesic dome uses a network of connected struts to create a rounded structure. It looks impressive and can make unusual use of a garden space, but this design needs more careful planning than a conventional hoop house.
For a simple version, prepare a measured frame plan and use consistent connectors and suitable lightweight covering materials. The base must be level, and the structure needs appropriate anchoring. Small measurement errors can make it difficult to fit the pieces together neatly.
I would begin with a modest dome rather than attempting a large one immediately. Think carefully about the entrance, too, because a beautiful dome is of little practical use if you cannot reach plants comfortably.
Estimated cost: £60–£200
Build time: One to two days
Best for: Experienced DIY gardeners who enjoy unusual designs.
13. Make a CD-Case Propagator
Old clear CD cases can be repurposed into a small propagator for seed trays or tiny pots. It is a simple way to reuse unwanted materials, although it is far too small to serve as a full greenhouse.
Clean the cases and inspect them for cracks. Arrange suitable pieces around a small growing container, leaving a way to open the cover for ventilation. Secure the parts so they cannot fall onto seedlings, and handle brittle plastic carefully to avoid sharp edges.
This mini project is most useful indoors, where you can monitor moisture and temperature easily. It may provide a little protection and help retain humidity, but it will not guarantee successful germination.
For a few seeds on a bright windowsill, it can be an inexpensive experiment.
Estimated cost: £0–£10
Build time: Around one hour
Best for: Tiny sowings and indoor seed experiments.
14. Convert Part of a Shed into a Growing Space
An existing shed can sometimes be adapted into a useful propagation area by adding a clear roof section or suitably positioned translucent panels. This approach is different from a traditional greenhouse, but it may suit gardeners who need covered storage alongside their growing space.
First, check the shed’s condition, its available light and whether its structure can support the planned changes. A dark shed is not likely to become a good growing environment simply by adding a small window.
Avoid enclosing plants in a hot, poorly ventilated space. Any electrical work for lighting or heating should be assessed and carried out by a qualified professional where required.
I would reserve this idea for an existing shed that already gets decent daylight and can be modified sensibly.
Estimated cost: £70–£250
Build time: One to three days
Best for: Gardeners with a suitable existing shed and extra materials.
15. Use a Clear Umbrella as a Mini Greenhouse
A transparent umbrella can act as a temporary cloche over a pot or small plant. It is a quick way to reuse something you already own, especially when a young plant needs a little shelter from cool weather.
Place the umbrella over a suitable support so it does not press against the foliage. Secure it properly, keeping in mind that wind can catch the canopy and tip the arrangement over. Never assume an ordinary umbrella will stay put outdoors in gusty conditions.
On sunny days, open or remove the cover to prevent overheating and excess condensation. It is best treated as short-term protection rather than an all-season growing structure.
I would use this trick for a small container, then switch to a purpose-made cloche if the plant needs longer-term protection.
Estimated cost: £5–£20, or less with an existing umbrella
Build time: 10–30 minutes
Best for: Temporary protection for individual potted plants.
Comparing These DIY Greenhouse Ideas: Costs and Build Time
The table below gives a quick comparison to help you choose. Costs are approximate UK DIY budgets rather than fixed prices, and they assume basic tools are already available. Reclaimed materials can lower the total, while new timber, glazing and delivery may push it higher.
| Idea | Rough cost | Build time | Difficulty |
|---|---|---|---|
| PVC hoop house | £35–£90 | 1 day | Easy–moderate |
| Pallet greenhouse | £30–£100 | 1–2 days | Moderate |
| Old-window greenhouse | £50–£200 | 2–3 days | Moderate–hard |
| Single-window cold frame | £10–£45 | 2–4 hours | Easy |
| Lean-to greenhouse | £60–£180 | 1–2 days | Moderate |
| Bottle mini greenhouse | £0–£15 | 1–2 hours | Easy |
| A-frame greenhouse | £30–£90 | ½–1 day | Moderate |
| Polytunnel | £60–£180 | 1 day | Moderate |
| Raised-bed cover | £15–£50 | 2–4 hours | Easy |
| Old-door greenhouse | £50–£180 | 1–2 days | Moderate |
| Mini shelf greenhouse | £20–£60 | 1–2 hours | Easy |
| Geodesic dome | £60–£200 | 1–2 days | Hard |
| CD-case propagator | £0–£10 | 1 hour | Easy |
| Shed conversion | £70–£250 | 1–3 days | Hard |
| Umbrella cloche | £5–£20 | 10–30 minutes | Easy |
My advice: Start with a cold frame, raised-bed cover or mini shelf greenhouse if you have never built anything like this before. These projects are inexpensive, manageable and useful enough to show what works in your garden before you spend more.
7 Mistakes That Ruin DIY Greenhouses
Even the best DIY greenhouse ideas can disappoint if the structure is poorly planned. These are seven mistakes I would try to avoid.
1. Forgetting About Ventilation
A greenhouse can become much hotter than the outdoor air, particularly during sunny spring and summer days. Leaving seedlings in a sealed structure can cause heat stress, wilting and excessive humidity.
Make sure the design has a door, an opening panel or another reliable way to release hot air. Check the plants regularly, and open the structure when conditions require it.
2. Not Anchoring the Frame Properly
A lightweight greenhouse can move in strong winds if the frame and covering are not secured. This is particularly important for hoop houses, polytunnels, shelving units and temporary cloches.
Use fixings appropriate to the frame and ground, check them after storms and replace anything that becomes loose. A temporary structure should be easy to dismantle safely when severe weather is expected.
3. Choosing the Wrong Plastic
Ordinary thin plastic may split, sag or deteriorate when exposed to sunlight and weather. It can also be awkward to secure without tearing.
Choose a suitable greenhouse covering and follow its installation guidance. Check for damage during the growing season and replace deteriorated material before it compromises the structure.
4. Making the Entrance Too Small
A greenhouse needs more than enough room for the plants. You must also be able to water, weed, check leaves and carry pots through the entrance.
I would test the proposed doorway before finishing the frame. Think about the size of the trays and containers you use most often, and allow room to move without knocking plants over.
5. Ignoring Rainwater and Drainage
Rainwater that collects on a flat roof or around the base can damage timber, encourage rot and make the growing area unpleasant to use.
Give the roof a suitable slope, inspect the covering regularly and choose a well-drained location. Direct water away from paths and building foundations, and avoid placing a greenhouse where rainfall naturally pools.
6. Using Unsafe or Unstable Reclaimed Materials
Old windows, pallets and doors can save money, but not every reclaimed item is suitable. Rotten timber, loose joints, sharp edges and damaged glazing can create unnecessary hazards.
Inspect everything before building. Use secure supports and appropriate fixings, take care when handling glass, and get help from a suitably experienced person for structural work beyond your skills.
7. Expecting the Greenhouse to Stay Warm Without Help
Clear covering traps some warmth, but it does not make a greenhouse frost-proof. Temperatures can drop sharply overnight, and a small structure may lose heat quickly.
Match the design to the plants you intend to grow. Use insulation where appropriate, monitor temperatures and provide additional protection during cold spells. Choose crops suited to the conditions instead of assuming a DIY greenhouse can replicate a heated growing room.
Keeping Your DIY Greenhouse Warm and Ventilated
A DIY greenhouse works best when it provides protection without trapping excessive heat and moisture. In the UK, where the weather can change quickly, I find it useful to think about daytime and nighttime conditions separately.
During the day, open doors and vents whenever temperatures start to rise. Even a cool spring morning can turn into a surprisingly warm afternoon inside a clear enclosure. Small greenhouses can heat up especially quickly because there is relatively little air inside them.
At night, close openings when the weather becomes cold, provided the structure is not too damp and the plants will benefit from the extra shelter. Keep a simple minimum-and-maximum thermometer inside so you can see how cold the greenhouse gets rather than relying on guesswork.
For winter protection, horticultural fleece can help protect suitable plants during colder spells. Bubble-wrap insulation may also reduce heat loss, although it will reduce the amount of light reaching plants. Fix any insulation so it cannot fall onto seedlings or obstruct doors and vents.
Avoid watering heavily late in the day when conditions are cold and air circulation is limited. Damp leaves and persistently humid air can encourage fungal problems. On dry, mild days, opening the greenhouse briefly can help release moisture.
Heating is not necessary for every greenhouse. Hardy seedlings and many cool-season crops can grow without artificial heat, provided their conditions are suitable. Tender plants need more careful protection, and any heating method should be used safely.
For more advice on reducing heat loss and choosing suitable heating methods, read the RHS guide to heating a greenhouse efficiently.
The main thing I would remember is that warmth, light and ventilation need to work together. A tightly sealed, overheated greenhouse is no better for plants than a cold, draughty one.
What to Grow First in Your DIY Greenhouse
Once your greenhouse is ready, start with plants that suit its size and the conditions you can provide. There is no need to fill every shelf or bed straight away. I would begin with a few varieties, learn how the structure behaves and expand once I know what grows well.
Salad leaves and hardy herbs are excellent choices for compact spaces. Lettuce, rocket and other suitable salad crops can provide regular picking, while herbs such as parsley and coriander can make good use of pots and shelves.
Seedlings for the garden are another sensible starting point. A greenhouse or cold frame can give young plants some shelter while they develop, although seedlings still need appropriate light, moisture and airflow. Tender plants should not be moved outside until conditions are suitable.
Tomatoes and cucumbers can be rewarding in a larger greenhouse with sufficient light and ventilation. They need more room than seedlings, so consider the eventual size of the plants rather than how small they look in their pots.
Radishes and other quick-growing crops can help you make productive use of limited space. Choose varieties that suit your growing conditions, and avoid overcrowding containers or beds.
If you are new to propagation, my guide on how to start seeds in an unheated greenhouse is a useful next step. It helps you think about sowing times and the conditions seeds need without assuming you have a heated greenhouse.
One final tip: keep a small notebook of what you sow, when it germinates and how the temperature behaves. After one growing season, you will have a much clearer idea of what your own greenhouse can do.
Conclusion: Start Small with DIY Greenhouse Ideas
The best DIY greenhouse ideas are not necessarily the biggest or most complicated. They are the ones that fit your garden, budget and growing plans. A cold frame made from an old window or a simple raised-bed cover can be a worthwhile first project, while a pallet greenhouse or polytunnel may suit someone who wants more room.
I would start with one manageable weekend project, use sound reclaimed materials where possible and leave enough time to think about ventilation, drainage and secure fixings. You can always expand once you have seen how your first structure performs through a British spring and summer.
You do not need a perfect greenhouse to enjoy growing your own plants. Start with a few trays of seedlings, learn as you go and build on what works for you.
Frequently Asked Questions
1. What is the cheapest DIY greenhouse to build?
A plastic bottle plant cover or a cold frame made from a reclaimed window is often among the cheapest options. If you already have the materials, you may spend very little beyond a few fixings.
2. Do I need planning permission for a DIY greenhouse in the UK?
A small greenhouse in a typical back garden may fall under permitted development, but this is not guaranteed. Rules and restrictions can depend on your location, property, conservation status, listed-building designation and the structure’s size and position, so check with your local planning authority before building.
3. What can I grow in a small DIY greenhouse?
You can raise seedlings, grow salad leaves, cultivate herbs and start suitable vegetables such as radishes. Larger structures can also accommodate tomatoes and cucumbers if they have sufficient light, height and ventilation.
4. How long does a plastic DIY greenhouse last?
Its lifespan depends on the quality of the covering, sunlight exposure, wind, installation and maintenance. Purpose-made UV-resistant greenhouse film generally lasts longer than ordinary household plastic, but you should inspect it regularly and replace it when it deteriorates.
5. Can a DIY greenhouse work in winter?
Yes, a DIY greenhouse can protect hardy plants, shelter suitable crops and help with propagation during winter. However, an unheated structure can still reach freezing temperatures, so tender plants may need additional protection or a suitably controlled, safe heat source.