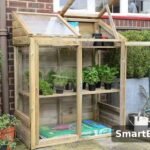
Choosing a small greenhouse kit can make a real difference to what you grow in a British garden, whether you want to raise tomato plants, protect seedlings from chilly spring nights, or keep herbs growing for longer. You do not need a huge garden or advanced DIY skills to get started. With the right kit, you can create a useful growing space without designing and building the entire structure from scratch.
Table of Contents
I think the biggest advantage of buying a ready-made kit is that most of the difficult planning has already been done. The frame, panels, fixings and assembly instructions are usually included, so you can concentrate on choosing a suitable spot and deciding what to grow. It can also be easier to estimate the overall cost before committing to a project.
Of course, not every greenhouse suits every garden. A compact plastic model might be perfectly adequate for a few trays of seedlings, while a taller, walk-in greenhouse makes more sense if you want to grow tomatoes, cucumbers and other crops throughout the season. The best choice depends on your available space, budget, preferred materials and how much maintenance you are prepared to do.
In this guide, I will look at eight types worth considering, explain their advantages and drawbacks, and share practical buying and assembly advice. The aim is to help you choose something that fits your garden and your gardening habits, rather than spending money on features you will rarely use.
What to Check Before Buying a Small Greenhouse Kit
Before comparing prices, I would start by working out what you actually need. A bargain greenhouse is not particularly good value if it is too short, too flimsy or awkward to access once it is filled with plants.
1. Garden size and footprint
Measure the available space before choosing a model. Remember to allow room around the structure for opening doors, reaching vents, cleaning panels and carrying watering cans.
A compact tiered greenhouse may fit neatly on a patio or balcony, whereas a walk-in model needs enough floor space for the frame and a comfortable entrance. If you plan to grow vegetables in containers, consider how much room the pots will occupy as well.
Height matters just as much as floor area. A tall greenhouse can accommodate climbing crops and hanging accessories, while a low model may restrict you to seedlings and smaller plants.
Check the manufacturer’s external dimensions, not just the advertised growing area. Also consider nearby walls, fences, trees and overhanging branches.
2. Frame material: aluminium, steel or wood
The frame supports the glazing and gives the greenhouse its shape, so it deserves careful attention.
Aluminium is lightweight, generally rust-resistant and relatively low-maintenance. It is a common choice for traditional garden greenhouses because it does not require routine painting. However, lightweight frames still need proper anchoring and sound assembly.
Steel can provide useful strength, particularly when protected with a suitable coating. The quality of the coating matters because exposed or damaged areas can corrode. Check the frame specifications rather than assuming every steel greenhouse is stronger than every aluminium one.
Wood offers a traditional appearance and can complement established gardens beautifully. It may be especially attractive for a timber lean-to or decorative greenhouse. The trade-off is maintenance: untreated or poorly protected timber can deteriorate when exposed to persistent damp, and some wooden frames are bulkier than metal alternatives.
For a straightforward, low-maintenance purchase, I would usually begin by comparing aluminium options with good glazing and a clear warranty.
3. Glazing: glass, polycarbonate or plastic cover
Glazing affects light transmission, insulation, durability and cost.
Glass provides excellent light transmission and a clear view of the plants. It is a strong option for gardeners who want a traditional greenhouse for raising seedlings and growing light-loving crops. However, ordinary horticultural glass can break, and replacement panes may be an additional expense.
Polycarbonate is a practical alternative. Twin-wall panels are lightweight, resistant to shattering and can provide better insulation than single-pane glass. Their disadvantage is that some types transmit less light than glass, and panels need to be installed in the correct orientation and protected from dirt entering their channels.
Flexible plastic covers are common on affordable walk-in greenhouses. They are inexpensive and easy to fit, but the material may split, become cloudy or need replacing over time. The quality of the cover, stitching, frame and fastenings makes a considerable difference.
For a family garden or a beginner’s first greenhouse, I would seriously consider polycarbonate because it offers a useful balance of practicality and durability.
4. Does it need a base?
Some kits include a base frame, while others expect you to prepare a separate foundation. Do not assume that the greenhouse can safely stand on any available surface.
A level, stable base helps the frame remain square and allows doors to open properly. Depending on the design and location, suitable foundations might include a properly prepared paved area, a firm slab or a purpose-built base.
A freestanding aluminium greenhouse may need a compatible base or anchoring system. A lightweight plastic greenhouse might instead use ground pegs and additional securing arrangements specified by the manufacturer.
Check whether the advertised price includes the base, fixings and anchoring hardware. These extras can affect the total cost.
5. Doors and ventilation
A greenhouse can become surprisingly hot, even when the weather outside feels pleasant. Without sufficient ventilation, plants may experience excessive heat and humidity.
Look for a door that opens easily and provides enough space to move trays and pots inside. Sliding doors can be useful where there is little room for a door to swing outward.
Roof vents are particularly valuable on traditional greenhouses. Depending on the model, side vents, adjustable windows and roll-up covers can also improve airflow.
I would avoid choosing a model solely because it looks attractive or retains warmth. You need a practical way to release excess heat, especially when raising seedlings or growing tomatoes and cucumbers.
6. Is shelving included?
Shelving is particularly useful in a small greenhouse because it makes better use of vertical space.
Tiered shelves provide somewhere to put seed trays, small pots and propagation equipment. However, shelves can cast shade on the plants below, so they are not always ideal for growing light-hungry seedlings throughout the structure.
Check the weight capacity and whether the shelves are removable. Being able to take them out can make it easier to accommodate taller plants later in the season.
7. Delivery, spare parts and warranty
Greenhouse kits can arrive in several boxes, and some larger models require careful handling. Before placing an order, check the delivery area, estimated delivery arrangements and whether the panels are protected adequately for transport.
Read the warranty to see what it covers. A frame warranty may not cover glazing, plastic covers, accidental damage or storm damage. Also look for information about replacement panels, door runners, clips and other parts.
I would rather buy a straightforward model from a supplier that explains its specifications and replacement-parts policy than choose a slightly cheaper kit with little information available.
The 8 Best Small Greenhouse Kit Types for UK Gardens
There is no single greenhouse type that is best for everyone. The following options cover different budgets, garden sizes and growing needs. Prices are approximate UK buying-guide ranges, not fixed quotations, and vary with dimensions, construction quality, accessories and delivery.
1. Polycarbonate Small Greenhouse Kit
A polycarbonate greenhouse uses rigid plastic panels rather than traditional glass. Many models combine twin-wall panels with an aluminium frame, although the exact construction varies.
This is one of the first options I would consider for an ordinary UK garden. Polycarbonate is lightweight, does not shatter like glass and can offer useful insulation, particularly when the panels have multiple walls.
Who it suits best: Beginners, families, vegetable growers and gardeners looking for a practical greenhouse without the fragility of conventional glazing.
Pros
- Lightweight glazing is easier to handle than glass.
- Twin-wall panels can help reduce heat loss.
- Good options are available for compact patios and small gardens.
- A suitable model can accommodate seed trays, herbs and container-grown vegetables.
- The panels do not break into sharp shards in the same way as ordinary glass.
Cons
- Some panels transmit less light than glass.
- Low-cost models can have flimsy frames or awkward panel-fitting systems.
- Panels may become scratched or damaged if handled incorrectly.
- Ventilation and anchoring still need attention.
Rough UK price range: £250–£750 for many small walk-in options, with premium or larger models costing more.
When comparing a polycarbonate small greenhouse kit, I would look closely at panel thickness, the quality of the frame, the included anchoring system and the number of vents. A slightly more expensive kit may be better value if replacement components are readily available.
2. Glass Small Greenhouse Kit
A glass greenhouse is the traditional choice for gardeners who want plenty of natural light and a clear view of their plants. These kits typically use an aluminium or timber frame and separate panes of horticultural or safety glass.
Glass can be particularly useful for growing crops that need strong light. It also has a familiar appearance that suits many established gardens.
Who it suits best: Gardeners who want a more permanent structure for seedlings, tomatoes, peppers, flowers and other light-loving plants.
Pros
- Excellent light transmission.
- Clear panels make it easy to inspect plants.
- Glass does not become cloudy in the same way as some plastic covers.
- Traditional designs can look attractive in a garden.
- Individual panes may be replaceable if the manufacturer supplies suitable parts.
Cons
- Ordinary glass can break if struck.
- Glazing and installation require careful handling.
- Glass models can cost more than basic plastic alternatives.
- The structure needs a suitable base and secure installation.
Rough UK price range: £300–£900 for many smaller walk-in models, with larger or premium greenhouses costing considerably more.
If I were choosing this type, I would check exactly which glass is supplied. Safety glazing is particularly important in doors and locations where accidental impact is more likely. I would also budget for the base if it is sold separately.
Glass is an appealing choice, but it is worth remembering that a greenhouse’s growing performance depends on more than the panels. Good ventilation, sensible positioning and regular watering remain essential.
3. Wooden Small Greenhouse Kit
A wooden greenhouse provides a softer, more traditional look than an exposed metal frame. Depending on the design, it may use glass, acrylic or another form of glazing.
Some models resemble miniature garden buildings, while others are simple timber structures for raising plants. Pressure-treated timber can reduce certain maintenance demands, but the manufacturer’s care instructions still matter.
Who it suits best: Gardeners who value appearance, want a structure that complements timber fencing or garden furniture, and do not mind occasional maintenance.
Pros
- Attractive, natural appearance.
- Can suit cottage gardens and traditional outdoor spaces.
- Some designs provide useful built-in shelving or storage.
- Timber frames can accommodate certain practical customisations, provided the manufacturer permits them.
- A well-made structure can become a permanent garden feature.
Cons
- Timber can require treatment or maintenance.
- Poor drainage and persistent damp may shorten its life.
- Some frames take up more space than comparable metal designs.
- Quality timber models may be expensive.
- The glazing and ventilation arrangements vary significantly between products.
Rough UK price range: £300–£1,000 for many small models, with larger or more decorative designs potentially costing more.
With a wooden greenhouse, I would look beyond the photographs. Check the timber treatment, frame dimensions, glazing material and any stated anti-rot guarantee. Pay attention to where rainwater drains and avoid placing untreated wood directly onto damp ground unless the design specifically allows it.
This option makes sense when appearance is part of the decision, not simply when you want the cheapest way to protect seedlings.
4. Walk-In Plastic Small Greenhouse Kit
A walk-in plastic greenhouse usually consists of a lightweight metal or plastic frame covered by a flexible polyethylene cover. The cover commonly has a zipped or roll-up door.
These models are designed to provide protected growing space at a relatively low cost. They can be useful for seed trays, potted herbs and seasonal vegetables, especially when a rigid greenhouse is beyond the budget.
Who it suits best: Beginners, renters and gardeners who want an inexpensive way to extend the growing season.
Pros
- Usually one of the most affordable options.
- Lightweight components are relatively easy to move.
- Shelving may be included.
- The cover can be replaced on some models.
- Installation is often simpler than building a rigid greenhouse.
Cons
- Lightweight structures can be vulnerable to strong winds.
- Plastic covers may split, fade or deteriorate.
- Ventilation control may be limited.
- The internal shelves can become crowded quickly.
- A low-cost frame may not last as long as a well-made rigid structure.
Rough UK price range: £20–£150 for basic models, with larger or sturdier versions sometimes reaching £250.
I would treat this as a seasonal growing shelter rather than an automatically permanent garden building. Before buying, check whether replacement covers are available and whether the shelving can support the weight of your intended pots.
Position it in a sheltered but suitably bright location, following the manufacturer’s guidance. Secure it correctly, and inspect the structure after strong winds. If your garden is exposed, a sturdier frame may be the more economical choice over several years.
5. Lean-to Small Greenhouse Kit
A lean-to greenhouse sits against a suitable wall or another approved supporting structure. It uses the available wall space instead of standing independently in the garden.
This can be a clever solution for a small outdoor area, especially where a sunny, sheltered wall is available. Depending on the model, a lean-to can be a shallow shelf-style structure or a taller greenhouse with enough room to work inside.
Who it suits best: Gardeners with small patios, narrow gardens or limited floor space alongside a suitable wall.
Pros
- Makes use of otherwise unused wall space.
- Can be convenient to access from the house.
- May benefit from some shelter provided by the building.
- Some designs have a smaller footprint than freestanding greenhouses.
- Can be particularly practical for herbs and propagation.
Cons
- The wall may reduce light entering from one direction.
- Available height and depth may be limited.
- The wall and fixings need to be suitable for the installation.
- Rainwater runoff and drainage require consideration.
- Some designs are expensive compared with their growing area.
Rough UK price range: £150–£800 for many small models, with premium timber versions costing more.
Before ordering, measure both the available width and the usable height. Check the wall material and the manufacturer’s fixing instructions rather than assuming any wall will support the structure.
I would also think about access to the door and vents. A lean-to that is awkward to open or difficult to reach can quickly become frustrating, particularly during busy planting periods.
6. Mini Tiered Small Greenhouse Kit
A mini tiered greenhouse is a compact structure with several shelves arranged vertically. Some models have a flexible clear cover, while others use rigid plastic panels or a small metal frame.
It is particularly suited to gardeners who want to raise plants without giving up much floor space.
Who it suits best: Balcony gardeners, beginners, people with small patios and anyone raising a modest number of seedlings.
Pros
- Takes up little floor space.
- Makes use of vertical space.
- Usually inexpensive.
- Easy to position near a suitable sheltered wall.
- Useful for seed trays, small pots and young plants.
Cons
- Limited space for mature crops.
- Shelves can shade plants below.
- Lightweight versions need securing.
- Ventilation can be poor when the cover stays closed.
- Some covers are difficult to replace.
Rough UK price range: £15–£80 for common basic models, with sturdier rigid-panel designs sometimes costing £150 or more.
I would choose this type if my main purpose were raising seedlings and protecting small pots rather than growing full-sized vegetables. Check the distance between shelves, because advertised shelf counts do not tell you how tall each growing space is.
Also consider how easy the cover is to lift or unzip. Young plants need fresh air, and leaving a small greenhouse closed on a warm, sunny day can cause the temperature to rise rapidly.
7. Aluminium Frame Small Greenhouse Kit
An aluminium greenhouse uses a metal frame to support glass or polycarbonate glazing. Aluminium is generally resistant to rust and does not need the same painting routine as a typical untreated steel frame.
It is worth separating frame material from glazing material: an aluminium greenhouse can be glazed with different products, and the choice affects its performance.
Who it suits best: Gardeners wanting a relatively low-maintenance frame and a more permanent growing structure.
Pros
- Aluminium is generally corrosion-resistant.
- The frame is relatively lightweight.
- Traditional and modern designs are available.
- Compatible with several glazing options, depending on the model.
- Routine frame maintenance is often straightforward.
Cons
- Lightweight sections can flex if poorly designed or assembled incorrectly.
- Some budget models have fiddly connectors.
- A base and anchoring may be sold separately.
- The frame itself does not determine how well the greenhouse retains warmth.
- Quality and warranty terms vary between manufacturers.
Rough UK price range: £250–£850 for many small greenhouse kits, depending on size and glazing.
For me, the attraction is the combination of a practical frame and a choice of glazing. I would compare the complete package rather than pay extra for aluminium alone.
Look for well-explained frame dimensions, secure connections, useful ventilation and a reliable method of anchoring the greenhouse. A lightweight frame can work well, but it should not be confused with a structure that can safely withstand any wind conditions.
8. Polytunnel-Style Small Greenhouse Kit
A small polytunnel uses a curved frame covered by greenhouse film or another flexible covering. It may be a low tunnel intended for beds or a taller structure with enough room to walk into.
Unlike a traditional greenhouse with rigid panels, its flexible cover can often be replaced when worn, depending on the design.
Who it suits best: Vegetable gardeners, people growing crops in raised beds and anyone wanting protected growing space without conventional glass panels.
Pros
- Often provides a relatively large growing area for the price.
- Suitable for vegetables grown in beds or containers.
- Flexible covering avoids the need for multiple rigid glazing panels.
- Some designs can be assembled without specialist building work.
- Can help shelter crops from wind and heavy rain when properly installed.
Cons
- Cover quality and lifespan vary.
- Wind anchoring is particularly important.
- Ventilation may require opening doors or rolling up sides.
- Flexible coverings can be damaged by sharp edges or rubbing against the frame.
- Some models offer limited headroom or restricted access.
Rough UK price range: £50–£400 for many smaller kits, with larger, heavier-duty models costing more.
I would consider this type if growing vegetables is the main priority. A tunnel can make good use of ground space, but check the internal height and entrance width before buying.
The frame must be properly secured, and the cover should be fitted according to the instructions. If the film repeatedly flaps against the structure, it may wear prematurely. Good anchoring, sensible positioning and regular inspection are worthwhile from the start.
Quick Comparison Table: Small Greenhouse Kit Options
Here is a quick overview of the eight types to help narrow down your options.
| Kit type | Best for | Rough UK price |
|---|---|---|
| Polycarbonate | All-round home gardening | £250–£750 |
| Glass | Light-loving plants and traditional gardens | £300–£900 |
| Wooden | Appearance and decorative growing spaces | £300–£1,000 |
| Walk-in plastic | Affordable seasonal growing | £20–£150 |
| Lean-to | Patios and narrow gardens | £150–£800 |
| Mini tiered | Seedlings and balconies | £15–£80 |
| Aluminium frame | Low-maintenance permanent structures | £250–£850 |
| Polytunnel-style | Vegetables and raised beds | £50–£400 |
Prices are approximate buying-guide estimates for smaller designs. Some larger, premium or specially configured models exceed these ranges. Check the total price, including delivery, foundations, shelving and any required anchoring equipment.
My general starting point would be a polycarbonate model for versatile family gardening, a tiered greenhouse for a tiny patio, or a lean-to if floor space is limited. A glass greenhouse is worth considering when light transmission and traditional appearance are major priorities.
How to Assemble a Small Greenhouse Kit
A kit can simplify the building process, but taking a little care during preparation makes the job much easier. The exact assembly method varies, so the manufacturer’s instructions should always take priority.
Step 1: Prepare a suitable base
Choose a reasonably sunny site with protection from strong winds, while avoiding a position where the greenhouse will be heavily shaded.
Make sure the ground is level and stable. A prepared slab, suitable paving or a purpose-built greenhouse base may be appropriate, depending on the model. For a freestanding structure, check how the base must be fixed down.
Think about drainage before beginning. You do not want water collecting beneath the frame or running into a position where it damages nearby structures.
Before assembly, measure the footprint again and check that the entrance has enough clearance.
Step 2: Organise all the components
Lay out the parts in a clear working area and check them against the supplied inventory. Separate the frame sections, connectors, glazing panels, clips, screws and other fixings.
Read through the instructions before starting. If two frame sections look similar but have slightly different hole positions, mixing them up can lead to unnecessary dismantling later.
For a larger kit, having another person assist with holding frame sections can make the work more manageable.
Step 3: Assemble the frame in the correct order
Follow the sequence specified in the manual. Many kits require the base and lower frame sections to be assembled before the sides and roof, but designs differ.
Initially, avoid tightening every connector fully unless the instructions specifically require it. Some structures need a little adjustment so the frame can be squared accurately before final tightening.
Check the dimensions and alignment as you progress. Doors that bind or glazing panels that do not fit properly may indicate that part of the frame is out of square.
Step 4: Fit the glazing safely
If the kit uses rigid panels, handle them carefully and keep them supported as directed. Wear suitable protective gloves and eye protection where the instructions recommend them, particularly when handling glass or cutting materials.
Do not force a panel into place. Check its orientation, the correct channel and the position of the clips or gaskets first.
For polycarbonate glazing, follow any instructions about protective films, panel orientation and sealing. Incorrect installation can compromise the intended protection against water and moisture entering the panel channels.
Never leave loose glass panes leaning somewhere they could fall. Keep children and pets away from the immediate assembly area.
Step 5: Secure the greenhouse against wind
This step deserves as much attention as assembling the frame. Greenhouses can catch the wind, and lightweight models can move or become damaged if they are not properly secured.
Use the anchoring system supplied or approved by the manufacturer. Depending on the kit, this might involve securing the base to a prepared foundation or using specified ground anchors.
Do not assume a heavy pot placed inside is a sufficient substitute for proper anchoring. Likewise, do not attach the structure to a wall or fence unless the design and fixing instructions permit it.
Check doors, vents, panel clips and the frame before the greenhouse is put into use.
Step 6: Check ventilation and access
Open and close the doors and vents to make sure they work smoothly. If the kit has adjustable shelving, check that it fits securely and does not obstruct the entrance.
Place heavier pots where the shelves are designed to support them, and avoid overloading the upper tiers.
Before adding your plants, check the instructions for any final adjustments or recommended inspections.
Mistakes to Avoid When Buying a Small Greenhouse Kit
Even a well-priced greenhouse can disappoint if you overlook a few practical details. These are the points I would pay attention to before placing an order.
Buying too small
A greenhouse that fits today’s seed trays may become cramped once you add mature tomato plants, pots, watering equipment and shelves.
Think about how you intend to use the space over the next few growing seasons. If you mainly need protection for seedlings, a compact design makes sense. If you want to grow climbing vegetables, choose sufficient height from the beginning.
Choosing price over construction quality
An exceptionally cheap greenhouse may be suitable for occasional seasonal use, but its frame, cover and fixings might not suit a permanently exposed location.
Compare specifications rather than relying only on photographs. Check the materials, frame dimensions, glazing type, availability of replacement parts and stated warranty.
Ignoring ventilation
Heat builds up quickly inside small protected spaces. A greenhouse without convenient ventilation can be difficult to manage during sunny weather.
Make sure you can open vents or doors safely and regularly. If you spend long hours away from home, consider whether the design supports an appropriate automatic vent opener.
Forgetting wind exposure
A sheltered corner may be more suitable than an exposed position, particularly for a lightweight plastic greenhouse or polytunnel.
Check the manufacturer’s installation and wind guidance. Secure the frame correctly and inspect the covering and fixings after severe weather.
Overlooking the total cost
The advertised figure might not include the base, shelves, anchoring equipment or delivery. Some kits also need replacement covers or additional ventilation accessories.
Calculate the full cost before deciding that one option offers better value than another. It is worth comparing available small greenhouse kits and reading the specifications carefully before choosing.
Expecting a greenhouse to stay warm without help
A greenhouse can offer protection from wind and rain and help extend the growing season, but an unheated structure does not guarantee frost-free conditions during a British winter.
Select plants suited to the temperatures available, monitor conditions and use appropriate protection where needed. Avoid assuming that all tender plants will survive outdoors simply because they are beneath a cover.
Neglecting maintenance
Even low-maintenance materials need occasional attention. Clean glazing when necessary, remove plant debris, check that drainage is unobstructed and inspect fastenings periodically.
For timber structures, follow the recommended treatment schedule. For plastic-covered models, look for wear where the cover contacts the frame. Addressing minor issues early may help extend the useful life of the kit.
Making the Most of Your Greenhouse
Choosing the structure is only part of the process. To get useful results from a small growing space, organise it around the plants you intend to grow.
Seed trays can occupy shelves early in the season, while larger pots can go lower down to make watering easier. As seedlings grow, move them around so that taller plants do not block all the light from smaller ones.
Tomatoes and cucumbers benefit from sufficient growing height, while herbs and small salad crops can suit compact arrangements. Try not to fill every available shelf immediately; leaving room to work makes watering, harvesting and cleaning much simpler.
Ventilation is important even on relatively mild days. Open doors or vents as required, taking account of the weather and the plants inside. On hot days, appropriate shading may help prevent overheating.
It is also worth planning for winter before autumn arrives. Remove tired plants, clean trays, inspect the frame and decide which crops or young plants genuinely need protection. More advice and practical projects are available in these DIY greenhouse ideas if you want to make better use of the space you already have.
Conclusion
The best small greenhouse kit is the one that suits your garden, budget and growing plans without creating unnecessary work.
Polycarbonate is a sensible all-round option for many gardeners, while glass offers excellent light transmission and a traditional appearance. Wooden structures look attractive, lean-to greenhouses make efficient use of wall space, and tiered or plastic-covered models can be useful when the budget or available footprint is limited. A polytunnel-style kit is another option worth exploring if vegetable growing is your main priority.
Before buying, measure the space, compare the frame and glazing materials, check ventilation and make sure the price includes the essentials. Pay equal attention to the base and anchoring arrangements, because a well-assembled greenhouse needs a stable foundation.
Above all, choose a design that fits the way you garden. A modest, well-positioned structure that you can maintain easily is often more useful than a larger greenhouse that leaves you struggling for space, time or money.
Frequently Asked Questions
1. What size small greenhouse kit should I buy?
Choose according to the space available and the plants you intend to grow. A tiered model is suitable for a few trays of seedlings, while a small walk-in greenhouse is more practical for larger pots and vegetables. Measure the footprint, height and door clearance before ordering.
2. Is a polycarbonate or glass kit better?
Neither is automatically better for every garden. Polycarbonate is lightweight, resists shattering and can offer good insulation, while glass generally transmits more light and provides a clear view of plants. Consider safety, budget, growing needs and maintenance before deciding.
3. Do small greenhouse kits need a base?
Many freestanding models need a level, stable base and suitable anchoring, although the exact requirements depend on the design. Some lightweight kits use ground pegs or other specified fixings. Always follow the manufacturer’s instructions rather than placing the structure on uneven ground.
4. How long does a small greenhouse kit take to build?
A simple tiered model may take less than an hour, while a larger walk-in greenhouse can require several hours or longer. Preparation, glazing and foundation work add to the time. Check the instructions and allow extra time for careful assembly rather than rushing.
5. Can a small greenhouse kit survive winter?
Yes, many can remain in place during winter when installed and secured correctly, but their ability to withstand severe weather varies. Follow the manufacturer’s wind and weather guidance, inspect fixings, and secure or remove flexible covers when instructed. An unheated greenhouse may still experience freezing temperatures inside.