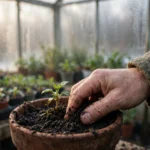
There’s a special kind of heartbreak known to every seed-starter: you sow a tray of tomatoes, they germinate beautifully, tiny green loops pushing up through the compost — and then, overnight, half of them are lying flat, their stems pinched thin and brown at soil level, gone. That was my March two years ago. Three trays of peppers, dead in 48 hours. The culprit was damping off, and I didn’t even know its name until it had already won.
If you want to know how to prevent damping off in greenhouse seedlings, the good news is that it’s one of the most preventable problems in all of gardening. Damping off isn’t bad luck — it’s a disease with specific causes, and every one of those causes is something you can control. This guide walks you through the 10 steps that took me from losing whole trays to losing almost none.
Table of Contents
What Damping Off Actually Is (and Why Greenhouse Seedlings Are So Vulnerable)
Damping off isn’t one disease — it’s a whole gang of soil-borne fungi and fungus-like organisms (Pythium, Rhizoctonia, Fusarium, and Phytophthora are the usual suspects) that attack germinating seeds and young seedlings. They live in soil and compost everywhere, waiting for the right conditions: cool, wet, still air — which, if we’re honest, describes a lot of greenhouses in early spring.
Greenhouse seedlings are especially vulnerable for three reasons. First, we sow densely in trays, so one infected seedling passes the disease to its neighbours in hours. Second, greenhouses in late winter and early spring are humid and slow to warm — exactly the cool, damp conditions these pathogens love. Third, seedlings are at their weakest in the first two weeks after germination: their stems are soft, their defences are minimal, and a single lesion at the stem base is fatal.
The frustrating part? Damping off rarely announces itself in advance. Healthy-looking seedlings collapse fast, often overnight. That’s why prevention — not treatment — is the whole game. By the time you see it, the infected seedlings are already lost. Everything below is about making sure it never gets started.
The Two Moments Damping Off Strikes
Damping off hits in two distinct ways, and it helps to know both:
Pre-emergence damping off kills the seed before or just after it germinates, below the compost surface. You never see a seedling at all — you just get patchy, disappointing germination and blame the seed packet. If your germination rates are mysteriously low in spring, pre-emergence damping off is a prime suspect.
Post-emergence damping off is the dramatic one: seedlings emerge fine, then develop a thin, pinched, brown lesion at the stem base, topple over, and die — often in a spreading patch across the tray. You might also see a faint white web of fungal growth on the compost surface around the fallen seedlings.
Both forms are caused by the same pathogens and prevented by the same steps. Let’s get into them.
Step 1: Start With Fresh, Sterile Seed-Starting Mix
This is the foundation everything else rests on. Never sow precious seeds into garden soil, old potting compost from last year, or a bag that’s been sitting open and damp in the corner of the greenhouse. All of those are likely carrying damping-off pathogens.
Use a fresh, commercial seed-starting mix — ideally a new bag each season, stored sealed and dry. These mixes are formulated to be low in pathogens and to drain freely, which matters as much as sterility. Heavy, soggy compost is damping-off heaven no matter how clean it starts.
If you make your own mix or want extra insurance, you can pasteurize compost by moistening it and heating it to about 80°C (not hotter — you want to kill pathogens, not sterilize the beneficial biology completely) for 30 minutes. A roasting bag in the oven works, though your kitchen will smell like a forest floor. I’ll be honest: for the price of a bag of seed compost, I just buy fresh every year. It’s the cheapest insurance in gardening.
Step 2: Clean and Disinfect Your Trays Before Every Sowing
Those plastic cell trays and pots you saved from last year? They’re carrying last year’s fungi. Damping-off organisms survive happily in the dried compost clinging to tray corners, and they’ll wake up the moment you add water and fresh seed.
Before every sowing round: scrub trays in hot soapy water to remove all old compost, then soak for 10 minutes in a 1:9 bleach solution (one part household bleach to nine parts water) or 3% hydrogen peroxide. Rinse well and let them dry completely before filling. It takes ten minutes and it eliminates one of the biggest infection sources in the home greenhouse.
I keep a dedicated “sowing kit” — clean trays, fresh compost, labels, a pencil — that lives in a sealed box. Nothing goes back in dirty. It sounds fussy; it works.
Step 3: Sow Thinly — Crowding Is an Invitation to Fungi
Over-sowing is the mistake almost every beginner makes (I sowed my first trays like I was salting chips). Crowded seedlings touch each other, trapping humid air between their stems — a perfect fungal highway. One infected seedling in a crowded tray can take down the whole cell in a day.
Sow thinly: 2–3 seeds per cell at most, then thin to the strongest seedling once they’ve germinated. If you’re sowing in open trays, space seeds at least 2–3 cm apart. Yes, it feels wasteful when you have a full seed packet. It’s far less wasteful than losing the entire tray.
Good spacing also means better airflow around each stem, which brings us to the step most people skip entirely.
Step 4: Water From Below — and Never in the Evening
How you water matters as much as how much you water. Overhead watering splashes compost (and fungi) onto seedling stems, keeps foliage wet, and creates exactly the damp stem-base conditions where damping off starts.
Instead, bottom-water: set your trays in a shallow tray of water for 10–15 minutes so moisture wicks up from below, then remove them and let them drain completely. The compost surface stays relatively dry while the root zone gets the moisture it needs. Never let trays sit in standing water — soggy compost is the single biggest risk factor.
And time it right: water in the morning only. Seedlings watered in the evening sit in damp compost through the coldest, stillest night hours — peak fungal activity time. Morning watering gives everything the day to dry out. This one habit alone cut my seedling losses dramatically.
Step 5: Get Air Moving — The Fan Trick
If I could only give you one anti-damping-off tip, it would be this: run a small fan. Stagnant, humid air around seedlings is what lets fungal spores germinate on stem surfaces. A gentle breeze changes everything — it dries stem bases, strengthens seedlings (the slight movement actually makes stems sturdier), and breaks up the humid microclimate in crowded trays.
You don’t need anything fancy. A small USB fan on low, positioned to blow gently across the trays rather than directly at them, running for most of the day, is enough. I run mine on a timer: on at 8 am, off at 8 pm. Combined with a cracked vent for fresh air exchange, it transformed my spring seedling success rate.
Remove humidity domes and propagator lids as soon as most seeds have germinated, too. Domes are great for germination and terrible for seedlings — they trap exactly the warm, wet, still air that fungi love. If you must keep a dome on, vent it daily and remove it at the first sign of green.
Step 6: Warm the Soil — Cool Compost Favours the Fungi
Here’s a detail that surprises people: damping-off fungi actually prefer cool conditions, while seeds germinate best warm. That mismatch is why early-spring sowings in a chilly greenhouse are so vulnerable.
The fix is bottom heat. A heated propagator mat under your seed trays keeps the compost at 18–21°C even when the greenhouse air is cool. Warm compost means faster germination (so seeds spend less time in the vulnerable pre-emergence window) and conditions that favour the seedling over the fungus. It’s the single best investment for anyone who starts seeds in an unheated greenhouse — and if that’s your setup, that guide covers the whole system, from timing to frost protection.
No heat mat? Sow later, when the greenhouse warms naturally, or germinate seeds indoors in warmth and move them to the greenhouse once they’re sturdy. A seedling with a thick stem and true leaves is enormously more resistant than a just-germinated one.
Step 7: Give Seedlings Maximum Light
Leggy, stretched seedlings aren’t just ugly — they’re weak. Seedlings straining for light grow thin, soft stems with poor defences, and they stay in the vulnerable just-germinated stage longer. Strong light grows stocky, tough seedlings that resist infection.
In late winter and early spring, greenhouse light is at its weakest, and dirty glass makes it worse. Clean your glazing before sowing season (it can make a shocking difference), position trays where they get the most light, and consider a simple LED grow light on a timer (14–16 hours) for your most precious sowings. The seedlings under my cheap shop light are visibly sturdier than the ones relying on February daylight alone.
Turn trays daily too, so seedlings don’t all lean one way — even growth means even strength.
Step 8: Act Ruthlessly at the First Sign of Trouble
Despite your best efforts, you might still see it: a seedling keels over, stem pinched at the base. When that happens, act fast and don’t be sentimental.
Remove the affected seedling immediately — tweezers, straight into the bin (not the compost heap). Then remove its immediate neighbours too, even if they look fine; by the time one seedling shows symptoms, the fungus has usually spread through the compost around it. Increase airflow, ease off watering, and make sure the tray drains freely.
Do NOT try to “save” a damped-off seedling. There is no cure. Every hour you leave an infected seedling in the tray, spores are spreading to the healthy ones. Ruthlessness now saves the rest of the tray.
Step 9: Consider Biological Help for Problem Batches
If you’ve had damping off before — same greenhouse, same trays, recurring losses — the pathogens may be well established in your setup, and cultural controls alone might not be enough. This is where biological fungicides earn their place.
Products containing beneficial organisms like Trichoderma harzianum or Bacillus subtilis can be watered into the compost at sowing time. These friendly microbes colonize the root zone and outcompete the damping-off pathogens. They’re approved for organic growing, safe for seedlings, and genuinely effective as a preventive — note the word preventive; like everything with damping off, they work before infection, not after.
I’m not sponsored by anyone here and I don’t use these routinely — good hygiene and airflow handle 95% of cases. But if you’re fighting recurring losses, they’re a legitimate next step before reaching for anything chemical. For the full technical picture, Penn State Extension’s damping-off page is the most authoritative free resource I’ve found on the biology and control of this disease.
Step 10: Keep the Whole Greenhouse Clean
Damping off doesn’t only live in your seed trays. The same fungi lurk in old compost piles, dirty benches, algae-covered floors, and dead leaves left from last season. A spring clean of the greenhouse before sowing season removes the reservoir of infection that re-contaminates your clean trays.
Sweep and disinfect benches, clear out dead plant material, scrub algae off the floor, and don’t store open bags of compost on damp greenhouse floors. I do a full clean-down every February before the first sowings — it takes an afternoon and it’s as important as any step above.
What to Do If Damping Off Has Already Started
Caught it mid-outbreak? Here’s the damage-control protocol:
- Remove every affected seedling immediately, plus their neighbours. Bin them — never compost.
- Stop overhead watering and switch to bottom-watering only, in the morning.
- Maximize airflow — fan on, vent cracked, domes off.
- Let the compost surface dry between waterings. Slightly dry is safer than slightly wet right now.
- Don’t sow new seeds into the same tray. Start fresh: clean tray, fresh compost.
- Sow a backup batch of your most important varieties right away, in a clean tray with fresh mix. Succession sowing is the gardener’s insurance policy.
You probably won’t save the affected tray. But you can absolutely save the season.
Frequently Asked Questions
What is damping off?
Damping off isn’t one disease — it’s the name for a group of soil-borne fungi and fungus-like organisms (Pythium, Rhizoctonia, Fusarium and Phytophthora are the usual culprits) that attack seeds and seedlings at soil level. It kills in two ways: before emergence, when seeds rot underground and never appear, and after emergence, when healthy-looking seedlings develop a pinched, brown lesion at the stem base, keel over and die — sometimes within hours.
Why do my seedlings die overnight?
That overnight collapse is the classic sign of post-emergence damping off. The fungi thrive in cool, wet, still conditions, so a tray that’s damp from evening watering, sitting in a cool greenhouse with no air movement, is the perfect target. The stem lesion girdles the seedling at compost level and it simply topples. It’s not bad luck — it’s the combination of moisture, cool temperatures, crowding and stagnant air, and every one of those is fixable.
Can cinnamon prevent damping off?
Cinnamon gets recommended a lot as a natural antifungal dusting for the compost surface. In my experience it’s, at best, a minor extra — the evidence for it is anecdotal, and it won’t save seedlings if the underlying conditions (wet compost, no airflow, dirty trays) are still there. I’d put your effort into the steps that actually work: sterile mix, clean trays, thin sowing, bottom-watering in the morning and a fan. If you want to dust a little cinnamon on top as well, it won’t hurt — just don’t rely on it.
How much airflow do seedlings need?
Enough that you can see the seedlings trembling very slightly — a gentle, constant movement of air across the trays, not a gale blowing directly at them. I run a small USB fan on low, aimed to blow across the trays rather than at them, for most of the day. That keeps the compost surface and the leaf zone from staying damp and stagnant, which is exactly what damping-off fungi love. Remove humidity domes and propagator lids as soon as most seeds have germinated, too.
Can affected seedlings be saved?
No — and this is the hard truth. Once a seedling’s stem is pinched and brown at the base, there is no cure; it will die. Worse, every hour you leave it in the tray, it’s releasing spores onto its neighbours. Pull affected seedlings immediately with tweezers, bin them (never compost them), and focus on saving the rest of the tray: more airflow, a drier surface, bottom-watering only. Then sow a backup batch in a clean tray with fresh mix.
When should I start seeds to avoid damping off?
Damping-off fungi prefer cool conditions while seeds germinate fastest in warmth, so timing matters. Either start seeds when your greenhouse is reliably warm enough (a heated propagator mat keeping compost at 18–21°C works brilliantly), or germinate indoors in warmth and move seedlings out once they’re sturdy. Sowing too early into a cold greenhouse is one of the most common triggers I see — with no heat mat, wait until the greenhouse warms naturally.
Conclusion
Damping off in greenhouse seedlings feels like bad luck the first time it flattens a tray overnight, but it’s really just a disease with an address: cool, wet, still and crowded. Change the address — fresh sterile mix, disinfected trays, thin sowing, morning bottom-watering, a fan moving air across the trays, warm compost and maximum light — and the fungi can’t get a foothold.
That’s the whole system, and it took me from losing three trays of peppers in 48 hours to losing almost none. Nothing fancy required: a bottle of disinfectant, a fresh bag of compost and a cheap USB fan will take you most of the way. Sow your next batch this way, and those tiny green loops pushing through the compost will still be standing in the morning.