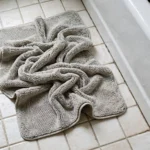
I nearly went down in my own bathroom last spring — not in the tub, but stepping out of it. One wet foot landed on my bath mat and the whole thing skated across the tile. I grabbed the door frame and stood there dripping, thinking there has to be a way to stop bath mat slipping on wet tile without those cursed little suction cups.
Suction-cup mats are a lie we all tell ourselves. Half of them never grip properly, they trap water underneath and turn slimy, and peeling one up at 6 a.m. sounds like ripping tape off a wound. So I spent a few weeks testing every suction-free alternative I could find. Here’s what actually worked.
Table of Contents
How to Stop Bath Mat Slipping on Wet Tile: Why It Slides in the First Place
A bath mat stays put through friction — contact between its backing and your floor. Wet tile sabotages that three ways at once. First, water is a lubricant: a thin film between mat and tile lets the surfaces glide instead of grip. Second, wet tile is never really clean — soap and shampoo build an invisible film that fills in the tile’s texture, removing the very thing the mat would grip. Third, most bath mats are light. Step onto one edge with a wet foot, your weight shifts sideways, the mat lifts, water rushes underneath — and it hydroplanes.
That reframed the problem for me: reduce the water, restore the grip, add friction, and give the mat enough weight or anchoring to resist a sideways shove. Every fix below does at least one of those four things.
Why Suction-Cup Mats Fail (And Why I Gave Up on Them)
Textured or matte tile defeats them. Suction cups need a smooth, non-porous surface. Most modern bathroom tile has some texture — mine has a subtle stone grain — and the cups can’t seal on it. They grab for a day, then let go one by one.
Soap film breaks the seal. Even on smooth tile, shampoo and body-wash residue creeps under the mat. Once a film sits between cup and tile, air leaks in, suction dies, and the mat slides exactly when you need it most — right after a shower.
Worn cups lose their shape. The soft PVC flattens, hardens, and creases over time, especially in a steamy bathroom. After six months, mine wouldn’t seal even on smooth tile.
They trap water and get gross. The sealed underside is a mildew farm. You have to peel the whole thing up regularly to clean under it, and every peel stresses the cups further. So no — this article isn’t about finding a better suction cup. It’s about skipping the flawed mechanism entirely.
The Step Everyone Skips: Clean the Tile AND the Mat Backing
This is the boring fix, and it’s the one that makes every other fix work better. I nearly skipped it — “my floor looks clean” — until I ran a finger across the tile under the mat and it came away faintly slick. That slickness is soap film, and it undermines everything: pads, liner, silicone dots, all of it.
Clean the tile. Hot water plus a good squirt of dish soap, which cuts body oils and soap scum better than most floor cleaners. Scrub the mat’s area with a stiff brush, rinse thoroughly, and wipe dry — dish soap residue is slippery too. For hard-water haze, a 1:1 white vinegar and water wipe works; rinse that off as well.
Clean the mat backing. Flip the mat over. A rubber backing usually carries a thin gray film of soap and mineral deposits. Scrub it with the same dish-soap solution, rinse well, and let it dry completely — draped over the tub edge, backing to the air. A damp backing slides no matter what’s under it. And while you’re at it: a lot of that slippery film comes from a soap bar melting into a puddle in the shower and tracking out under your feet. If you’re fighting that problem too, my walkthrough on keeping your soap bar from going mushy in the shower covers exactly how. My tile stayed cleaner far longer once I sorted this.
Do this prep once, properly, then repeat monthly. Everything below assumes a clean surface.
Fix 1: Put a Non-Slip Rug Pad Under the Mat
The single most effective thing I tried — it’s what my mat sits on today. A non-slip rug pad (rug underlay) is a thin open-weave mesh, usually PVC or natural rubber, that grips both the floor below and the mat above while letting water drain through instead of pooling.
How: Cut the pad about one inch smaller than the mat on every side — a pad sticking out past the edge is a trip hazard. Lay the pad on clean, dry tile first, mat centered on top. Shove it with your foot; it shouldn’t budge more than a few millimeters.
What to buy: Bathroom/kitchen-rated pads in natural rubber or high-density PVC, roughly 3–5 mm thick, for a few dollars or pounds. On natural stone or marble, choose natural rubber — cheap PVC can degrade and stain premium finishes. Lift the pad every few weeks to check for trapped moisture.
Fix 2: Lay Gripper Shelf Liner Under the Mat
The budget cousin of Fix 1. Gripper shelf liner — the rubbery, holey drawer-liner stuff — works on the same principle: grippy texture on both sides, water drains through the holes. I tested it in my guest bathroom and it held well under light use. The trade-off is lifespan: it’s thinner, so under a heavy daily-use mat it’ll compress and need replacing every 3 to 6 months, versus a year-plus for a proper rug pad. Cut it an inch smaller than the mat on all sides, double it up if it’s very thin, and replace it the moment it curls, cracks, or feels slimy.
Fix 3: Stick Silicone Dots on the Mat’s Backing
My favorite DIY fix. Apply dots of pure silicone sealant to the mat’s backing, let them cure, and the cured silicone becomes hundreds of tiny grippy feet.
How: Flip the mat backing-up. With a tube of 100% silicone sealant (the bathroom/kitchen kind), squeeze out coin-sized dots, 2–3 cm across, spaced 7–8 cm apart in a grid — or draw wavy lines for maximum coverage. Lay the mat perfectly flat while it cures, because silicone holds whatever shape it cures in. Give it a full 24 hours; use the mat early and the silicone will smear. Cured silicone grips tile through pure friction — no airtight seal to fail. Ventilate while it cures (it smells strongly), keep kids and pets away for those 24 hours, and use only 100% silicone — acrylic caulk dries hard and brittle.
Fix 4: Switch to a Low-Profile Rubber-Backed Mat
Sometimes the mat itself is the problem. Thin cotton mats, memory foam mats, anything with a fabric or sprayed-latex backing will slide once wet and heavy, regardless of what’s underneath. A low-profile mat with a solid rubber backing changes the equation because the backing itself is a grip surface.
What to look for: Solid rubber backing (not sprayed latex, which flakes off over time) bonded to a low, dense pile. Low-profile matters twice: it dries faster, so less water weight works against you, and it won’t bunch at the edges. Around 60 x 90 cm suits most bathrooms. Paired with a rug pad underneath (Fix 1), this is the closest thing to a permanent solution — the two grip surfaces multiply each other’s friction.
Fix 5: Dry the Tile Before the Mat Goes Down
Too simple to matter? It made a real difference in my bathroom. Water trapped under the mat is the main lubricant in the sliding equation — laying the mat onto wet tile guarantees a slick layer from the start.
The routine: After your shower, take a dry towel and wipe the floor where the mat sits — ten seconds. Or flip the mat up onto the tub edge after every shower so the tile underneath dries completely, then lay it back down on dry tile. The “flip the mat up” habit did more for me in the first two weeks than any product, and it costs nothing. Bonus: a mat that never sits on permanently wet tile lasts longer and stays mildew-free.
Fix 6: Position the Mat Where Your Feet Actually Land
Center it in your exit path. The mat should sit exactly where your feet land when you step out — not six inches to the left where you’ll catch only its edge. An edge-step sends mats flying because all your force lands on one side and the mat pivots. Stand in the shower, note where your feet naturally land, and center the mat there.
Keep it out of the water stream. Don’t let it sit where shower spray hits it or where water pools. If your floor slopes toward a drain or a low corner, put the mat on the highest, driest part of your exit path.
One mat, fully on the floor. Overlapping two mats, or letting one hang half off another rug, creates layers that shift against each other — mat-on-mat contact is nearly frictionless when damp.
Fix 7: Try a Weighted Mat for Stubborn Cases
If the mat still creeps — common in multi-person households or on floors with a slight slope — a weighted mat solves it with brute force. Friction scales with downward force: a 2–3 kg mat resists sideways shoves far better than a 300-gram cotton one. Look for mats marketed as “heavyweight” or “commercial,” usually with a dense rubber core; they cost more than a standard mat but less than most people expect. The trade-off: heavy mats dry slower and are harder to wash, so check yours fits the washing machine before buying. I’d still pair one with a rug pad (Fix 1) rather than relying on weight alone.
Fix 8: Use Rug Tape That’s Safe for Tile
The nuclear option. Double-sided rug tape made for hard floors physically bonds the mat to the tile — zero movement, guaranteed. But read the caveats first.
How, safely: Buy tape labeled specifically for tile, stone, or hard floors — not aggressive carpet-installation tape. Cut strips 10–15 cm long, place them around the mat’s perimeter plus a couple in the center on clean tile, press the mat down firmly.
The caveats: Even “removable” tape can leave residue on textured or matte tile, where adhesive gets into the grain. Test a piece in a hidden spot (behind the toilet) for a week before committing, and replace the tape every few months — old adhesive is far harder to remove. For residue: warm it with a hair dryer, rub with a little cooking oil or adhesive remover, then wash with dish soap. If someone in your household is unsteady on their feet, this is the most secure option here.
Fix 9: Keep a Cleaning Routine That Preserves Grip
Every fix above degrades if soap film builds back up. The difference between a mat that stays put for a year and one sliding after a month is maintenance:
Weekly: Shake the mat out and hang it over the tub edge for a few hours so both sides dry. Wipe the tile underneath with a damp cloth.
Monthly: Machine-wash the mat if the care label allows — cool or warm water, no fabric softener, which coats fibers and kills grip. Scrub the tile underneath. Inspect whatever’s under the mat — pad, liner, silicone dots — for wear, curling, or slime.
Quarterly: Re-check silicone dots for peeling, re-test rug tape adhesion, flip the rug pad to even out compression.
This is a five-minute monthly habit in practice. And the stakes are real — the National Institute on Aging’s falls-prevention guidance specifically calls for nonskid mats or strips on every bathroom surface that may get wet, and a mat only counts as “nonskid” if it’s actually gripping. Their full room-by-room checklist is worth a read: Preventing Falls at Home: Room by Room — National Institute on Aging.
When to Replace the Mat Entirely
No fix lasts forever. Retire the mat when the backing is cracked, flaking, or crumbling (no pad compensates for a destroyed grip surface); when the edges curl up more than about a centimeter (a trip hazard that also lets water flow underneath); when it smells musty no matter how you wash it (mildew has colonized the backing); or when silicone dots keep peeling off (the backing has degraded past bonding).
A decent rubber-backed bath mat lasts one to three years with regular washing. When you replace it, do the deep tile clean from the prep section at the same time — new mat, clean floor, fresh start.
The Short Version
If you only do three things: deep-clean the tile and the mat backing, put a proper non-slip rug pad under the mat cut slightly smaller than the mat itself, and flip the mat up after every shower so the tile underneath dries. That trio solved my sliding-mat problem completely — no suction cups, no morning ice-skating routine.
A mat that stays where you put it is one of the simplest safety upgrades in the whole house. It took me one weekend of experimenting and about the cost of a takeaway dinner to fix mine permanently. Yours is probably an afternoon’s work away too.