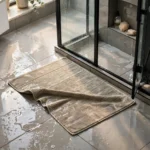
Every morning, for about six months, my bathroom floor mat tried to kill me. Well — not really. But that’s how it felt at 6 a.m., half awake, stepping out of the shower onto a rug that had somehow folded itself into a rumpled little ridge overnight. My heel would catch the ripple, the whole mat would skate forward on the tile, and I’d do that frantic little windmill-arms dance that nobody looks dignified doing.
I tried the obvious stuff first: flattening it with my foot (lasted about four steps), then a “heavier” mat that turned out to be heavier only in the marketing copy.
It took me embarrassingly long to figure out that to stop bathroom floor mat bunching up, you have to understand why it happens in the first place. Once I got that part, every fix suddenly made sense, and my mat hasn’t ridden up underfoot since. Bunching, I’ve learned, is something of a household theme — last year it was my bedding, and I had to learn how to stop my duvet cover bunching up inside before I could sleep in peace. Here’s everything that actually worked, and the reasons the “quick tricks” mostly don’t.
Table of Contents
Why Your Mat Rides Up Under Your Feet (And Why It’s So Hard to Stop Bathroom Floor Mat Bunching Up)
The bunching isn’t random, and it isn’t your imagination. It’s physics — specifically, a friction problem wearing a rug-shaped disguise.
Your bathroom tile is glazed, which means it’s essentially polished glass. The mat sitting on it is probably light — a kilogram or less of cotton or microfiber. And the air in a bathroom is humid, often damp underfoot from shower splashes, which creates a microscopic film of moisture between the mat’s underside and the tile. That moisture acts like a lubricant. So you’ve got a light object, on a slick surface, on a wet film, with almost nothing holding the two together.
Now walk on it. A walking foot doesn’t just press straight down — it pushes forward and backward with every step, like a mini treadmilling action. Each step shoves the fabric a few millimetres, and with no anchor, those millimetres accumulate: one edge migrates, a wrinkle forms, and every subsequent step feeds more fabric into it. That’s the ridge that catches your heel.
Knowing this changes how you fix it. Every solution below changes one of those variables: more grip between mat and floor, more weight, less moisture, or less room to wander.
Fix 1: Put a Proper Non-Slip Rug Pad Under It
This is the single most effective fix, and it’s the one most people skip. A non-slip rug pad — the open-weave rubbery kind sold for area rugs — adds a high-friction layer between the mat and the tile. It effectively turns a light mat into a heavier, grippier one.
The trick is sizing. Buy a pad larger than your mat, then trim it about 2–3 cm (roughly an inch) smaller than the mat on every side — exposed pad looks untidy, and a too-small pad leaves the edges free to curl. A standard 50 x 80 cm (20 x 32 in) bath mat wants a pad cut to about 45 x 75 cm.
Lay the pad on clean, dry tile, smooth it flat, then lay the mat on top and walk on it. This alone solves the problem for most mats. One caveat: pads wear out — after roughly a year of bathroom humidity, the rubbery coating degrades. When bunching returns, replace the pad, not the mat.
Fix 2: Use Double-Sided Rug Tape (The Tile-Safe Kind)
If a pad feels like too much faff, rug tape is the faster answer. I’m not talking about regular double-sided office tape, which gives up the moment it gets damp. I mean the carpet-safe, double-sided rug tape sold for securing runners — the kind rated for hard floors.
Peel and stick short strips around the mat’s underside perimeter, plus one diagonal cross in the middle, then press the mat firmly onto the tile. The tape’s grip survives daily foot traffic and the occasional splash.
Test a strip in a corner first; matte tiles can be fussier about releasing cleanly than glossy ones. Avoid tape on natural stone (marble, travertine): adhesive residue and some solvents used to remove it can etch or stain stone. On standard ceramic or porcelain tile, a dab of rubbing alcohol takes off any leftover tackiness.
Fix 3: Switch to a Genuinely Heavy, Rubber-Backed Bath Mat
Some mats bunch because they were designed to. Those ultra-plush, featherweight cotton bath rugs are lovely underfoot and hopeless on tile — there’s simply not enough mass pressing the underside against the floor. If your mat weighs less than about a kilogram at standard bath-mat size, consider replacing it rather than fighting it.
You want real heft and a solid rubber backing — the backing grips the tile directly, and the weight resists being shoved around by your gait. Look for 1.5 kg-plus for a 50 x 80 cm mat, and prefer solid rubber over sprayed-on latex coatings, which flake off in the wash within months.
One warning: mats with PVC backings can discolor vinyl and linoleum floors through a plasticizer reaction. On vinyl floors, choose a natural-rubber backing and lift the mat weekly to let the floor breathe.
Fix 4: Add Silicone Caulk Dots to the Underside
This is the DIY fix I resisted longest and now recommend most. Regular clear silicone sealant — the bathroom caulk you already own — cured in dots on the mat’s underside, acts like the grip nubs on a non-slip sock. The rubber dots grab the tile and the mat stops migrating.
Flip the mat over. Pipe dime-sized dots (about 1.5 cm across) in a grid, roughly 10–15 cm (4–6 inches) apart — dots flex with the fabric, while stripes and rings peel. Let the caulk cure fully: 24 hours minimum, 48–72 for a full cure, mat flipped upside-down in a ventilated room. Walking on it early squishes the dots flat and ruins the effect.
Best on flat-ish undersides — on thick shag the dots sink into the pile and never touch the floor, so use a pad for those. Re-dot when they wear flat.
Fix 5: Anchor It With Adhesive Velcro Strips
Velcro — hook-and-loop — strips are the commitment option, ideal if the same mat lives in the same spot forever. Stick 4–6 short strips (the adhesive-backed kind, not sew-on) to the tile, mate the other halves to the mat’s underside, and press them together. Foot traffic can’t shift it sideways, but you can still peel the halves apart for washing.
Wipe the tile spots with rubbing alcohol and let them dry completely — adhesive on a damp or soapy tile fails within days. Stick the floor halves down first, wait a full 24 hours before attaching the mat, then leave it another day before walking on it.
One honest limitation: the adhesive pads can pull finish off delicate floors if yanked rather than peeled slowly. On ceramic tile they’re fine. If your bathroom floor is wood or has a specialty finish, skip this one and use a rug pad instead.
Fix 6: Keep the Mat — and the Floor Under It — Bone Dry
Remember the friction problem from the start: moisture between mat and tile is a lubricant. A mat that’s perpetually damp underneath is a mat that’s perpetually sliding.
The fix is boring but real. After your shower, shake the mat out and drape it over the tub edge or a towel rail so air reaches both sides. Left flat on the floor all day in a steamy bathroom, the underside stays damp, mildew starts, and the slick film gets worse.
Wash the mat weekly in hot water. Detergent residue and fabric softener coat the fibres and the backing, reducing whatever natural grip the mat has — softener is genuinely the enemy here, since it works by coating fibres with a slippery film. Skip it for bath mats entirely. A funky smell despite regular washing usually means the backing has broken down — which brings us to the last section.
Fix 7: Size the Mat to the Space — Small Mats Bunch First
This one surprises people. A mat that’s too small for the area slides and bunches far more than a properly sized one, because your feet hit its edges and push it around instead of landing in the middle of it.
Measure before you buy. For the spot in front of the sink or vanity, the mat should be wide enough that you can stand on it with both feet without either foot hanging off the edge — usually at least 60 cm (24 in) wide for a single sink. In front of the tub or shower, a 50 x 80 cm mat is the minimum that stays put; a runner-style mat (60 x 120 cm or similar) that spans the walking path barely moves, because your steps land across its middle instead of kicking its edges.
Rule of thumb: if your mat is smaller than your stride’s landing zone, it’s undersized. Size up and half your bunching problem disappears on its own.
Fix 8: Tucking and Positioning Tricks That Cost Nothing
If you’re not ready to buy anything, positioning buys you a surprising amount. The goal is to eliminate the mat’s freedom to roam.
First, tuck one long edge under the tub or vanity toe-kick — even 2–3 cm of tucked edge acts as an anchor, and the furniture’s weight does the gripping for you. Second, line the mat up with the tile grout lines rather than setting it down at a random angle; mats placed square to the room slide less than rotated ones. Third, check the door swing. If the bathroom door drags across the mat’s corner every time it opens, it’s re-bunching your mat daily — shift the mat a few centimetres out of the swing’s path.
Finally, flatten the mat completely after every wash. A mat put down damp and wrinkled never really recovers — the wrinkles become permanent creases.
Fix 9: Clean the Tile Residue That’s Stealing Your Grip
Sometimes the mat isn’t the problem — the floor is. Soap scum, shampoo runoff, limescale from hard water, and residue from “shiny floor” mopping products all form an invisible film on tile. That film is slicker than the tile itself, and it murders whatever friction your mat’s underside has.
Give the mat’s parking spot a proper scrub: hot water, a squirt of dish soap, and a stiff brush, rinsed well. For limescale haze, white vinegar works on ceramic and porcelain — but never use vinegar on natural stone (marble, limestone, travertine), where the acid etches the surface and makes everything worse. On stone, use a pH-neutral stone cleaner. Rinse thoroughly; leftover cleaner film is just as slippery as the grime was.
Do this before you buy anything. Mats that “wouldn’t stay put no matter what” often behave perfectly after the tile underneath gets a proper scrub.
When to Admit Defeat: Replace a Worn-Out Mat
Some mats are beyond saving. Replace yours when:
- The edges curl upward and won’t flatten, even after washing and pressing under something heavy overnight.
- The rubber backing has gone crumbly, flaky, or sticky.
- The padding has flattened into a thin pancake that compresses unevenly and feeds the wrinkle cycle.
- It’s over two years old with heavy use — most budget bath mats last about 18–24 months before the materials give up.
Beyond the annoyance, a bunching mat is a trip hazard — and bathrooms are unforgiving places to trip: hard tile, sharp porcelain edges, nowhere soft to land. The US National Institute on Aging’s room-by-room fall prevention guidance specifically recommends placing nonskid mats on all surfaces that may get wet and checking that carpets are fixed firmly to the floor. If anyone in your home is older, unsteady, or small enough to collide with a vanity, a mat that won’t stay flat is a risk, not a quirk.
Conclusion
My mat hasn’t bunched in months now. My winning combo: a trimmed non-slip pad plus the silicone caulk dots — belt and braces, because I’d rather over-fix this than do the 6 a.m. windmill dance again. But any one of these fixes, applied properly and given a day to settle, will sort out the vast majority of wandering mats. Start with the pad, since it’s the cheapest and easiest. If that doesn’t do it, the mat itself might be the problem, and no amount of tape will save a mat that was too light, too small, or too worn from the start.
Fix it once, fix it right, and the problem disappears.