Building your own greenhouse can be one of the most rewarding improvements you make to your garden. A well-planned structure gives you greater control over temperature, moisture, light, and growing conditions, allowing you to start plants earlier, extend the growing season, protect delicate crops, and experiment with varieties that may not perform well outdoors. The good news is that you do not need to be a professional builder or spend a fortune to create a useful growing space. With the right materials, a practical design, and a little patience, you can build a greenhouse that fits both your garden and your gardening goals.
There are countless DIY greenhouse designs available today, ranging from compact backyard structures and lean-to greenhouses to larger walk-in models made from timber, metal, reclaimed windows, or modern polycarbonate panels. The best design is not necessarily the biggest or most complicated one. It is the structure that matches your available space, budget, climate, maintenance expectations, and the plants you intend to grow.
This guide explains how to build a DIY greenhouse in four easy steps. You will learn how to choose the right location, plan the structure, build the frame, install the covering, and finish the interior so your greenhouse is ready for growing. Along the way, we will also discuss ventilation, drainage, insulation, watering, maintenance, common mistakes, and simple ways to make your greenhouse more productive.
Whether you are a complete beginner or an experienced gardener looking for an affordable project, this guide will help you move from an empty patch of garden to a functional growing space with confidence.
Table of Contents
Why Building Your Own Greenhouse Is Worth It
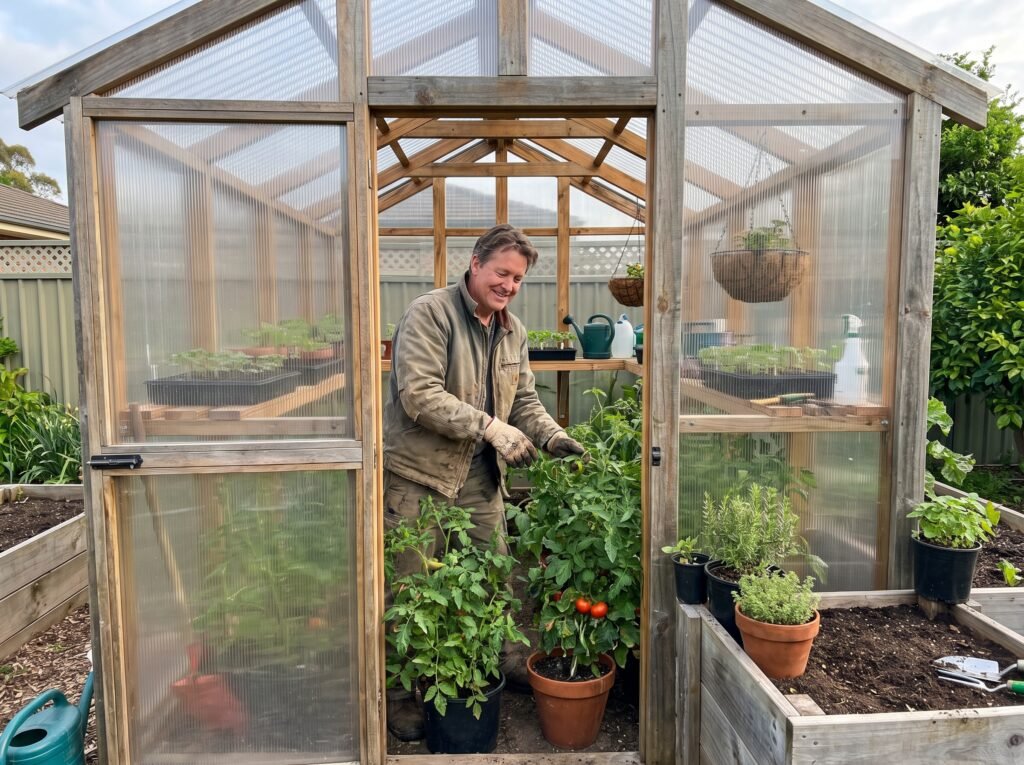
A greenhouse creates a controlled environment that can make gardening more predictable. Outdoor conditions can change quickly because of wind, heavy rainfall, unexpected cold temperatures, pests, and seasonal fluctuations. A greenhouse cannot eliminate every gardening challenge, but it can significantly reduce the impact of many of them.
One of the biggest advantages is season extension. In many climates, a greenhouse allows gardeners to sow seeds earlier in spring and continue growing selected crops later into autumn or winter. Even a small structure can provide protection from frost and cold winds while capturing useful solar heat during the day.
A homemade greenhouse also gives you flexibility. Commercial greenhouse kits are convenient, but they often come in fixed dimensions and may include features that you do not need. With a DIY project, you can select the dimensions, door location, ventilation openings, shelves, benches, and covering material yourself.
Cost is another major benefit. A carefully designed homemade greenhouse can be less expensive than a premium ready-made structure, especially when you use affordable framing materials or suitable reclaimed items. You can also build it in stages, adding automatic vents, irrigation, shelving, insulation, or heating later as your needs change.
Most importantly, constructing your own greenhouse teaches you how the structure works. That makes future repairs easier and helps you understand how to manage temperature, airflow, moisture, and growing conditions.
DIY Greenhouse Designs: Choose the Right Style Before You Build
Before buying materials, take some time to explore different DIY greenhouse designs. A common mistake is to start building before deciding exactly how the greenhouse will be used. Your design should begin with your plants and your available space rather than with the materials you happen to have.
A freestanding greenhouse is one of the most flexible options. It can be placed almost anywhere in the garden where there is sufficient sunlight and a suitable foundation. This style works well when you want a dedicated growing space and may want to expand later.
A lean-to greenhouse is attached to an existing wall, garage, shed, or other suitable structure. This can save space and reduce the amount of framing required. A south-facing wall may also provide useful thermal benefits in some locations, although the exact orientation should be considered in relation to your local sunlight and climate.
A hoop-style greenhouse is another beginner-friendly design. It typically uses curved sections of PVC, metal conduit, or other suitable tubing covered with greenhouse plastic. This type can be relatively inexpensive and quick to assemble, making it popular for vegetable growing and seasonal protection.
A traditional rectangular greenhouse with a peaked roof is a classic option. It provides good headroom, usable wall space, and a familiar shape that can accommodate benches, shelving, hanging baskets, and tall plants.
The four basic principles are more important than the exact style. Your greenhouse should have enough sunlight, sufficient ventilation, reliable drainage, and a strong structure that can handle the conditions in your area.
Step 1: Choose the Location and Prepare the Site
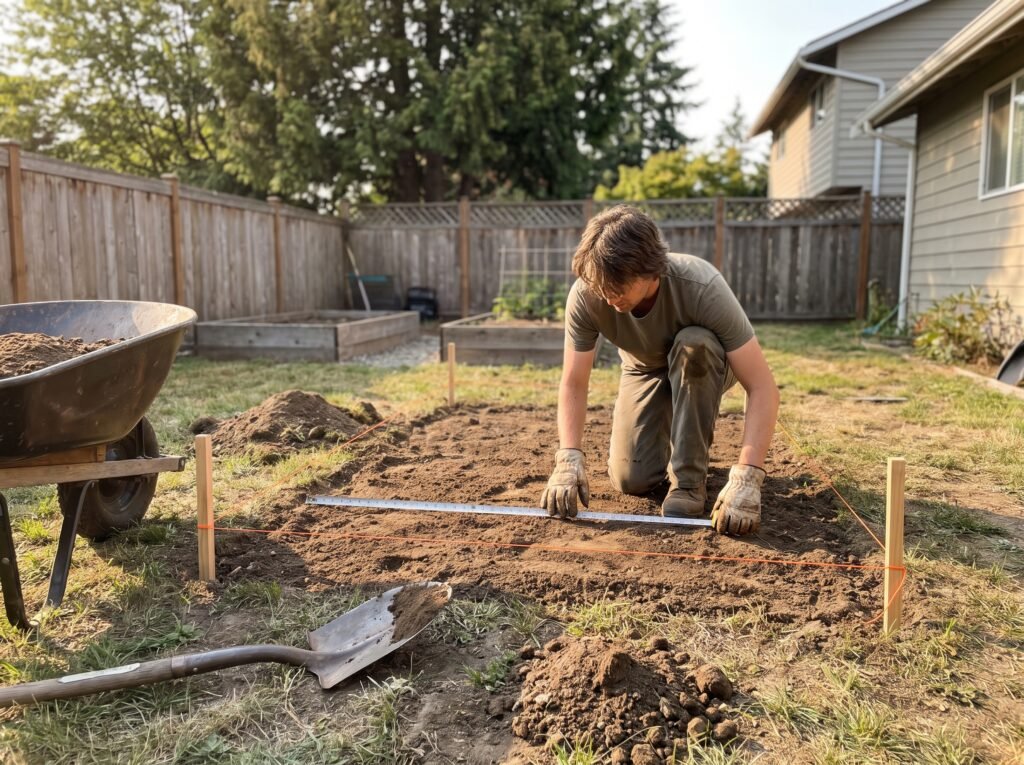
The first major step is choosing the right place for your greenhouse. Even an excellent greenhouse design can perform poorly when positioned in the wrong location.
Sunlight should be your first consideration. Most plants need several hours of good light to grow strongly, and a greenhouse that is heavily shaded may become disappointing regardless of how well it is constructed. Look at your garden throughout the day and identify where the strongest and most consistent natural light reaches the ground.
Remember that the position of the sun changes during the year. A location that appears bright in summer may receive much more shade during the colder months. Trees, fences, buildings, and neighboring structures can also cast long shadows. Try to think about the entire growing season rather than evaluating sunlight on one afternoon.
Wind protection is equally important. Strong winds can place considerable pressure on greenhouse frames and coverings. A sheltered location near an appropriate wall, fence, or hedge can help, but avoid putting the greenhouse where it becomes completely enclosed by obstacles. You still need airflow around the structure, and dense vegetation can create excessive humidity or attract pests.
Drainage is another major concern. Avoid naturally soggy areas or places where water collects after rain. Constant moisture around the foundation can cause structural problems and make the greenhouse interior difficult to manage.
Once you have selected the location, mark the greenhouse footprint. Use stakes and string to create straight, accurate lines. Measure the diagonals of the rectangle to confirm that the layout is square. This simple step can prevent alignment problems later.
The ground should be as level as practical. A small slope can sometimes be accommodated, but a significantly uneven surface makes framing, covering, shelving, doors, and drainage more complicated.
The foundation you choose depends on the size and design of the greenhouse. A small structure may work with a properly prepared ground surface and secure anchors, while a larger greenhouse may benefit from a timber base, concrete footings, paving slabs, or another durable foundation system.
Do not underestimate anchoring. A greenhouse acts like a sail in strong wind. Even a lightweight structure can be lifted or shifted if it is not secured properly. The foundation and anchoring system should match the local weather conditions and the size of the structure.
Before moving to construction, also think about convenience. You will probably carry bags of compost, trays, pots, watering cans, tools, and harvested crops into the greenhouse. A location that is technically suitable but difficult to access may quickly become frustrating.
It is also useful to position the greenhouse reasonably close to a water source. If you plan to install irrigation, a nearby supply can simplify the entire system.
Take your time during this first step. A few extra hours spent on site preparation can save you significant effort later.
Step 2: Build a Strong and Square Greenhouse Frame
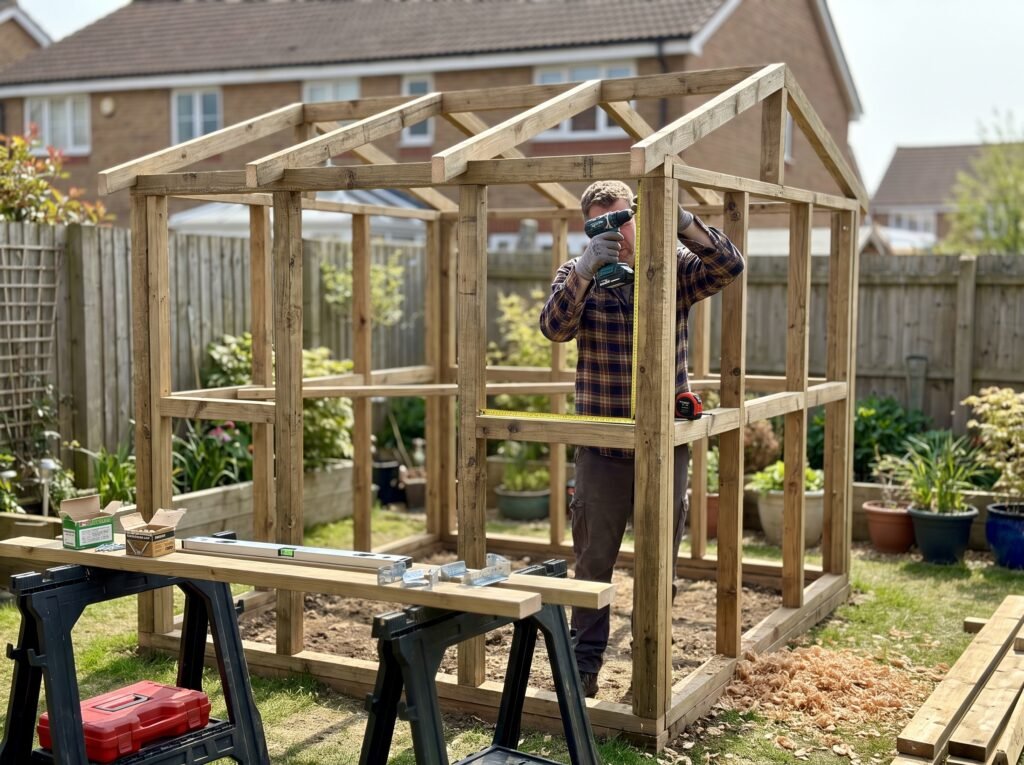
Once the site is ready, it is time to build the frame. The materials you choose will influence the appearance, durability, price, and maintenance requirements of the greenhouse.
Timber is a popular choice for DIY greenhouse frames because it is relatively easy to cut and work with basic tools. Properly selected and treated outdoor-grade timber can provide a sturdy structure with a warm, traditional appearance.
Metal frames can offer strength and a cleaner appearance. Lightweight galvanized tubing, aluminum components, or other suitable structural materials may be used depending on your design. Metal can be especially useful for curved or hoop-style greenhouses.
Whichever material you choose, accuracy matters. A greenhouse frame that is slightly out of square can cause problems later when you install glazing or plastic covering.
Begin with the base. Make sure the base is level, square, and securely attached to the foundation or anchors. Check measurements before fastening each section.
Next, install the corner posts and vertical supports. These members transfer the weight of the roof and covering down to the foundation, so they need to be securely connected.
Once the upright supports are in place, add the wall framing and top rails. Continue checking that the structure remains square as you build.
For a peaked greenhouse, install the roof structure carefully. The roof should have enough slope to shed rain effectively and provide a practical surface for your selected covering. A steeper roof can also improve headroom and reduce the chance of water pooling.
For hoop designs, evenly space the curved supports and secure them firmly at the base and along the top. Consistency is important because uneven spacing can make the covering difficult to install.
Doors deserve special attention. A door that is too narrow makes carrying equipment difficult, while a poorly framed door may sag or stick. Give yourself enough room to enter comfortably while carrying trays, tools, or mature plants.
You should also plan ventilation openings before completing the frame. Do not wait until the greenhouse is finished to decide where vents will go. Roof vents, side vents, louvered vents, or opening panels can be incorporated into the design from the beginning.
Cross-bracing can increase structural stability, particularly on larger frames. A sturdy greenhouse is not simply a collection of vertical posts. It is a connected structure that needs to resist sideways movement as well as vertical loads.
When fastening timber, use appropriate exterior-rated screws or connectors designed for outdoor conditions. Avoid using weak hardware simply because it is inexpensive. Rust-resistant fasteners can reduce maintenance and help keep structural connections secure.
For larger structures or areas exposed to severe weather, building codes or local planning requirements may apply. Check the relevant local requirements before construction, particularly when installing a permanent structure or placing it close to a property boundary.
A strong frame is the backbone of your greenhouse. It is worth building slowly and checking every measurement rather than rushing through this stage.
Step 3: Install the Greenhouse Covering and Ventilation
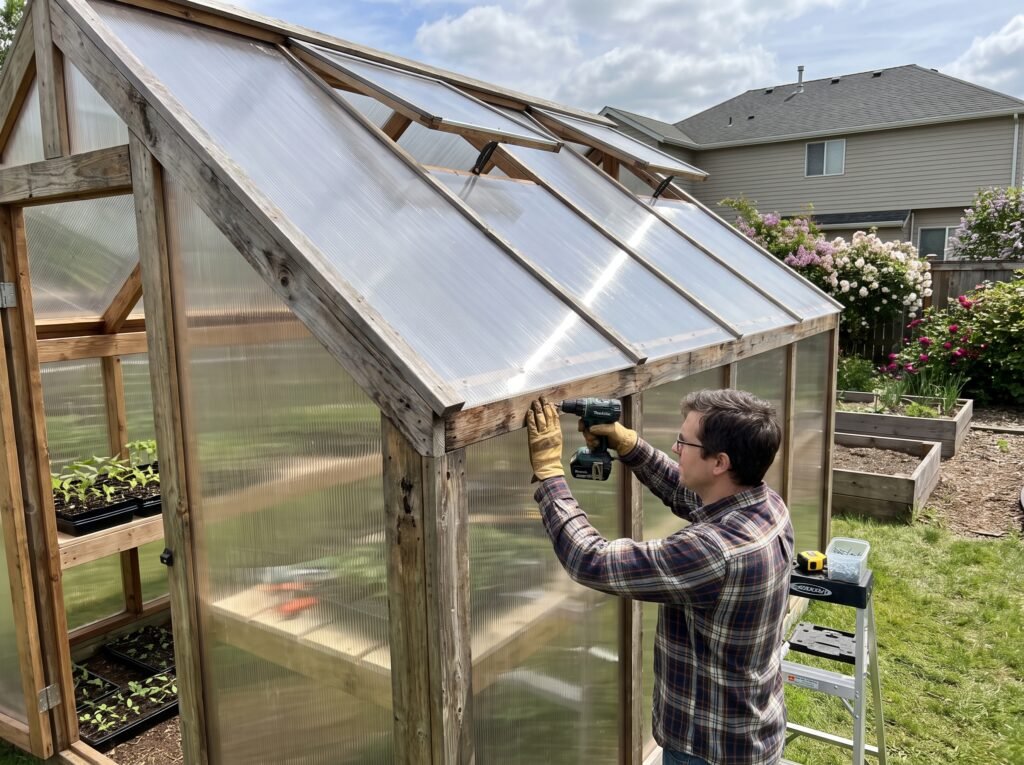
After the frame is complete, you can install the covering. This is the part that turns the frame into a greenhouse and creates the enclosed growing environment.
There are several common covering options, and each has advantages.
Greenhouse plastic film is generally one of the most affordable choices. It is lightweight, relatively easy to install, and suitable for many beginner projects. Good-quality greenhouse film is designed to transmit light while providing better durability than ordinary household plastic.
Polycarbonate panels are more rigid and durable. They are widely used in modern greenhouse construction because they provide good impact resistance and can offer useful insulation compared with single-layer coverings.
Glass provides a traditional greenhouse appearance and excellent light transmission, but it can be heavier and more fragile. It also requires a frame and installation method appropriate for glazing.
Your choice should depend on the climate, budget, expected lifespan, appearance, and level of maintenance you are comfortable with.
When installing plastic film, stretch it evenly without creating unnecessary tension that could damage the material. Secure the edges carefully so wind cannot get underneath them. Loose covering can flap, tear, and pull against the frame.
With rigid panels, follow the manufacturer’s installation guidance. Pay attention to panel orientation, expansion allowances, fasteners, and sealing methods. Incorrect installation can shorten the life of the covering and create leaks.
The covering is only part of the equation, however. Ventilation is just as important.
A greenhouse can become surprisingly hot on a sunny day. Without adequate ventilation, temperatures can rise rapidly, creating stress for plants and increasing humidity-related problems.
Natural ventilation works by allowing warm air to escape through openings while cooler air enters lower in the structure. Roof vents can be particularly useful because warm air naturally rises.
A simple DIY greenhouse can use manual vents that you open and close as needed. More advanced systems can include automatic vent openers that respond to temperature.
Doors can also contribute to airflow, but a doorway alone may not provide enough ventilation for a larger structure.
Think of ventilation as a daily management system rather than an optional extra. Your plants need fresh air movement, not simply protection from the outside environment.
In addition to ventilation, consider insect screening. Proper screening can help reduce the entry of certain pests while maintaining airflow, although it is not a substitute for regular plant inspection.
At this stage, inspect the greenhouse carefully from every angle. Check for gaps, loose fasteners, sharp edges, and weak points. Make sure rainwater can move away from the foundation rather than accumulating around it.
A well-installed covering should protect your plants without making the structure excessively humid or difficult to manage.
Step 4: Finish the Interior and Create a Productive Growing Space
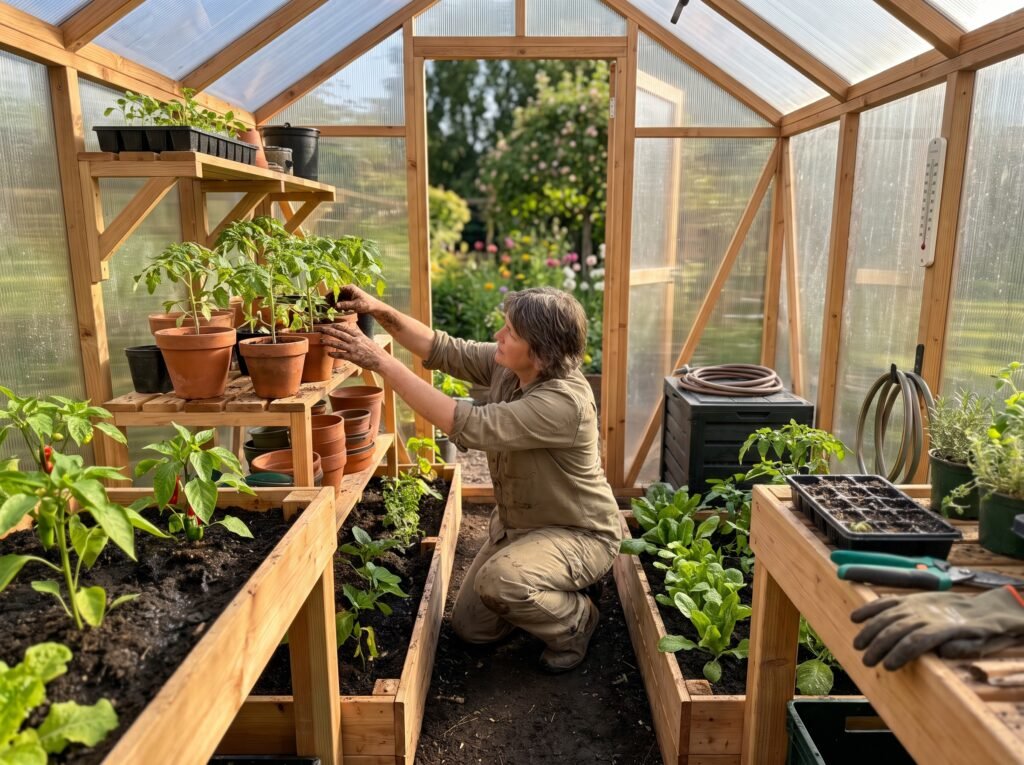
Once the exterior is complete, it is time to turn the empty greenhouse into a functional growing environment.
Many first-time builders focus so heavily on the structure that they forget to plan the inside. Yet interior organization has a huge effect on how useful your greenhouse becomes.
Start with pathways. You need enough room to walk between planting areas and access every plant. Avoid filling every available space with containers.
Raised beds can work well in larger greenhouses, while benches and shelves are useful for seedlings, herbs, trays, and smaller plants.
Vertical space is another valuable resource. Hanging baskets, trellises, vertical supports, and shelving can allow you to grow more without making the floor crowded.
Before adding furniture, decide what you will grow. Seedlings need different conditions from mature tomatoes, cucumbers, peppers, herbs, or ornamental plants. Tall crops may require additional headroom and structural supports.
Watering should also be considered. You can use a simple hand-watering system, soaker hoses, drip irrigation, or a more automated setup. Drip systems can be particularly useful for reducing water waste and delivering moisture directly to the root zone.
Whatever watering method you choose, avoid creating constantly wet conditions. Excess moisture can contribute to fungal problems, root issues, and unhealthy plant growth.
A thermometer is one of the most useful basic greenhouse accessories. It allows you to monitor temperature rather than guessing. A combined temperature and humidity monitor can provide even more useful information.
You may also need shading during periods of intense sunlight. Shade cloth or another suitable shading system can reduce excessive heat and protect plants from sun stress. However, avoid using permanent heavy shading if your plants need strong winter light.
Heating is another consideration, especially if you want to grow throughout colder months. The amount of heating required depends heavily on your climate, greenhouse size, covering, insulation, and plant requirements.
Do not immediately buy a powerful heater simply because the greenhouse feels cold. First improve insulation, seal unnecessary gaps, and make sure ventilation is not accidentally allowing excessive heat loss.
Thermal mass can also help moderate temperature fluctuations. Large containers of water, for example, can absorb heat during the day and release some of it as temperatures fall. The exact effect depends on the size and location of the thermal mass, so it should be viewed as an additional strategy rather than a complete heating solution.
Finally, organize your tools. A small shelf for hand tools, labels, trays, twine, gloves, and other essentials can make daily gardening much easier.
Your greenhouse should feel like a productive workspace rather than a storage room.
How to Make Your DIY Greenhouse More Durable
Building a greenhouse is only the beginning. The quality of the materials and the attention you give to maintenance will have a major influence on how long it lasts.
Wooden frames should be inspected regularly for signs of rot, water damage, splitting, or insect activity. Pay particular attention to areas where timber touches the ground or stays damp.
Metal structures should be checked for corrosion and loose connections. Fix small problems before they become larger structural issues.
The covering should also be inspected periodically. Small tears in greenhouse film can become large tears during windy weather. Replace damaged sections promptly.
Rigid panels should be checked for cracks, movement, or loose fasteners. Dirt and algae buildup can also reduce light transmission, so clean the covering when necessary using methods recommended for the material.
The foundation deserves attention too. Make sure water is not eroding soil around the structure or causing movement.
Good maintenance is often less expensive than major repairs.
Common Mistakes to Avoid When Building a DIY Greenhouse
One of the most common mistakes is choosing a location based only on convenience. A greenhouse hidden behind a building may be easy to access but receive inadequate sunlight.
Another mistake is making the greenhouse too small. Gardeners often discover that they need more room than expected once shelves, pots, pathways, and mature plants are added.
Ventilation is another frequently overlooked area. Beginners may focus on keeping heat inside and forget that overheating can damage plants just as quickly as cold temperatures.
Weak anchoring is also a serious problem. A greenhouse that looks stable on a calm day may not withstand strong winds.
Using unsuitable plastic is another avoidable mistake. Household plastic may deteriorate quickly when exposed to sunlight and weather. Purpose-designed greenhouse coverings are generally a better choice for long-term use.
Poor drainage can cause ongoing problems. Water that remains around the foundation can damage materials and create a damp environment.
Finally, avoid building a complicated greenhouse simply because a design looks impressive online. The best DIY structure is one you can safely construct, maintain, and use.
How Much Does a DIY Greenhouse Cost?
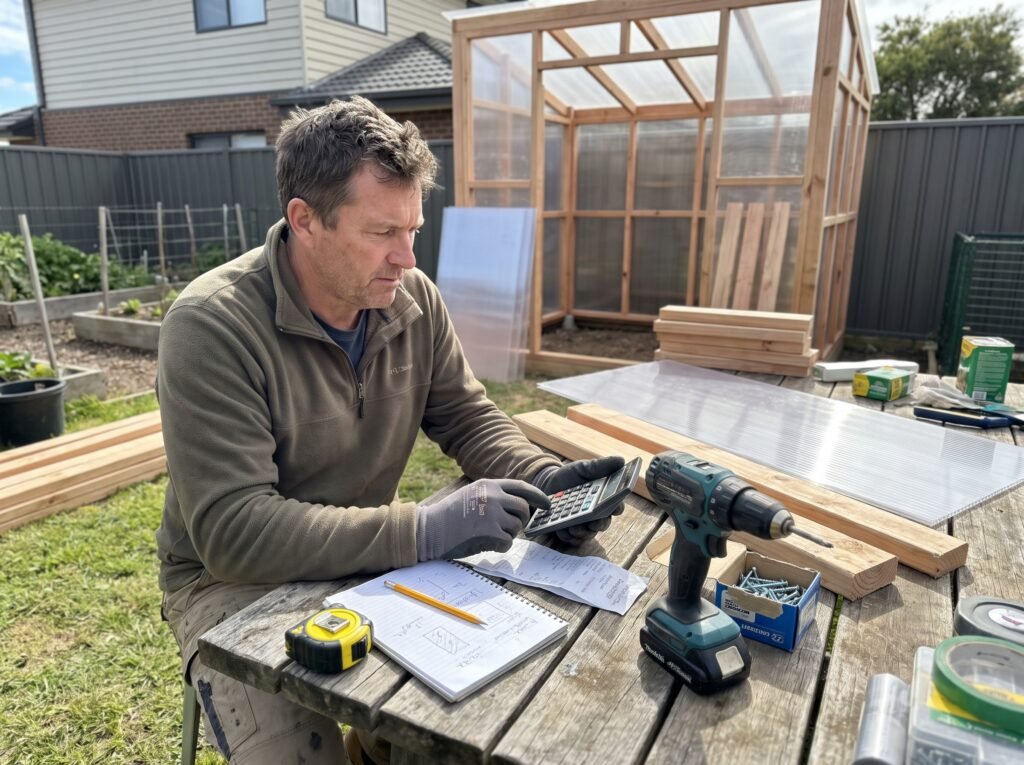
The cost of a DIY greenhouse can vary dramatically. The total depends on size, frame material, covering type, foundation, tools, ventilation, irrigation, and whether you already own some of the required equipment.
A small seasonal greenhouse made from relatively inexpensive materials may be completed with a modest budget. A larger timber or polycarbonate greenhouse with a permanent foundation, automated vents, irrigation, heating, and high-quality fixtures can cost significantly more.
The key is to establish a realistic budget before purchasing materials.
Separate your costs into categories such as foundation, frame, covering, doors, ventilation, fasteners, tools, interior fittings, irrigation, and optional heating.
Leaving some budget for unexpected expenses is also wise. Small projects often require additional hardware or replacement materials once construction begins.
You can save money through thoughtful design rather than by choosing the cheapest materials available. For example, a simple rectangular structure may be easier and less expensive to build than an unusually shaped greenhouse.
Reusing suitable materials can also reduce costs, but make sure anything reused is structurally sound and appropriate for outdoor conditions.
How to Use Your Greenhouse Efficiently Throughout the Year
A greenhouse becomes more valuable when you use it continuously rather than only for a few weeks each year.
During cooler months, you can use protected space for hardy crops, overwintering selected plants, starting seeds, or protecting young plants.
In spring, the greenhouse can become a nursery for seedlings before they are transplanted outdoors.
During summer, it can be used for warm-season crops that benefit from additional protection, provided adequate ventilation and shading are available.
In autumn, you can continue harvesting selected crops while protecting plants from worsening outdoor conditions.
The exact planting schedule depends on your climate and the crops you grow, so keep records each season. Note planting dates, temperatures, harvests, pest problems, and which varieties performed well.
Over time, your greenhouse can become a personalized growing system based on actual experience rather than generic schedules.
Greenhouse Irrigation and Water Management Tips
Water management is one of the most important parts of successful greenhouse gardening because rain cannot directly reach plants inside a sealed structure.
Hand watering is perfectly practical for a small greenhouse. It allows you to inspect plants closely and identify problems early.
For larger spaces, drip irrigation can save time and provide more consistent moisture. A timer can make the system easier to manage, although automated watering should still be checked regularly rather than left completely unattended.
Avoid watering based only on a fixed schedule. Conditions inside the greenhouse can change quickly due to weather, ventilation, plant size, and covering materials.
Check the growing medium and observe the plants. Water when appropriate for the specific crop rather than assuming every plant needs the same amount.
Good drainage is just as important as adequate irrigation. Containers should have suitable drainage holes, and beds should not become permanently waterlogged.
How to Improve Energy Efficiency in a DIY Greenhouse
If you plan to use your greenhouse during colder weather, energy efficiency should be considered before adding heating equipment.
Start by identifying where heat escapes. Gaps around doors, poorly fitted panels, and damaged covering can all reduce efficiency.
Double-layer coverings or insulated materials may provide better heat retention depending on the design.
Use doors and vents carefully. Ventilation is essential, but leaving everything open unnecessarily during cold periods can waste heat.
Position thermometers strategically so you understand how temperature changes throughout the day and night.
Heating should be matched to the actual requirements of the plants. Many plants do not need tropical temperatures, and selecting crops that suit your seasonal conditions can reduce energy demand.
This is another reason that thoughtful planning matters. A greenhouse designed for realistic growing goals is usually easier and less expensive to operate.
Safety Tips for Building a DIY Greenhouse
Before construction, make sure you have the appropriate tools and understand how to use them safely.
Wear suitable eye protection when cutting wood, metal, or rigid panels. Gloves can help protect your hands during construction, although they should not interfere with safe tool handling.
Use stable ladders or platforms when working at roof height. Do not overreach while installing panels or roofing materials.
If using power tools, follow the manufacturer’s safety instructions and keep electrical equipment away from standing water.
Glass requires extra caution because broken panels can create severe sharp edges. If you are uncomfortable installing glass, consider polycarbonate or another safer covering material.
If the greenhouse includes permanent electrical equipment, heating, lighting, or irrigation controls, ensure that the installation is appropriate for damp environments and complies with applicable requirements.
Safety should never be sacrificed to save a few minutes or a small amount of money.
Simple Ways to Make Your Greenhouse Look Better
Practicality comes first, but there is no reason your greenhouse cannot also become an attractive garden feature.
A well-finished timber frame can create a traditional appearance. Clean polycarbonate panels can provide a modern look, while reclaimed windows can produce a charming character-filled structure when properly installed.
Keep the area around the greenhouse tidy. A simple path leading to the entrance can make it feel more integrated into the garden.
Use matching containers and organized shelving to create a cleaner interior. Label plants clearly, but avoid cluttering benches with unnecessary equipment.
Plants themselves can become part of the design. A mixture of vegetables, herbs, seedlings, and flowering plants can make the greenhouse visually appealing as well as productive.
The best DIY greenhouse designs combine function and aesthetics so that the structure feels like a natural part of the garden rather than an afterthought.
DIY Greenhouse Designs for Different Garden Sizes
You do not need a large garden to enjoy the benefits of a greenhouse.
For a very small outdoor space, a compact lean-to structure may be the most efficient choice. It can make use of an existing wall while reducing the amount of floor space required.
A narrow greenhouse can fit along a garden boundary while still providing useful planting space. Shelving along the sides can make better use of vertical capacity.
Medium-sized gardens offer more options, including freestanding rectangular greenhouses and hoop structures.
Large gardens can accommodate bigger walk-in designs with dedicated beds, benches, storage zones, and irrigation systems.
The important principle is to choose dimensions based on your actual needs. A greenhouse should be large enough to work comfortably inside but not so large that it becomes expensive and difficult to maintain.
How to Plan Your First Planting Season
Once your greenhouse is finished, it can be tempting to fill every available space immediately. Resist that urge.
Start with a manageable selection of plants. Growing a few crops successfully will teach you how the greenhouse behaves throughout the day.
Observe temperature in the morning, afternoon, evening, and overnight. Watch where sunlight falls. Notice which areas dry quickly and which remain damp.
Use this information to improve the next planting cycle.
You may discover that the greenhouse gets hotter than expected at midday, that a certain shelf receives less light than you thought, or that airflow is stronger near the door.
These observations are valuable. A DIY greenhouse is not a static structure; it is an environment that you learn to manage.
Frequently Asked Questions About Building a DIY Greenhouse
Is it cheaper to build a greenhouse yourself?
A DIY greenhouse can be cheaper than buying a fully equipped commercial structure, particularly when you choose a simple design and shop carefully for materials. However, the final cost depends on size, materials, tools, foundation, and optional features. The cheapest option is not always the most economical over time, because poor-quality materials may need frequent replacement.
What is the easiest type of greenhouse to build?
A simple rectangular timber greenhouse or a basic hoop greenhouse is often suitable for beginners. Rectangular frames are relatively straightforward to measure and construct, while hoop designs can reduce the complexity of building a traditional roof.
How much sunlight does a DIY greenhouse need?
Most greenhouse plants perform best when they receive plenty of natural light, but exact requirements vary by crop. Observe your garden throughout the year before choosing a location. Seasonal changes in sun position can significantly affect light levels.
Does a greenhouse need ventilation?
Yes. Ventilation helps manage temperature, humidity, and air movement. Roof vents, side openings, doors, or automated venting systems can all contribute to better airflow.
Can I build a greenhouse from reclaimed materials?
Reclaimed materials can be useful, especially for creative DIY projects, provided they are clean, safe, structurally sound, and suitable for outdoor exposure. Check old timber for rot and inspect reclaimed glazing carefully for cracks or unsafe damage.
Should a greenhouse have a foundation?
The foundation requirements depend on the size and construction of the greenhouse. Small temporary structures may use secure ground anchors, while larger permanent structures generally benefit from a stronger base or foundation system.
Can I grow vegetables all year in a DIY greenhouse?
A greenhouse can extend the growing season considerably, but year-round production depends on your climate, greenhouse construction, heating, insulation, lighting, and crop selection. Some crops can tolerate cool conditions, while others require much warmer environments.
What is the best covering for a DIY greenhouse?
There is no universal best covering. Greenhouse plastic is affordable and practical, polycarbonate is durable and versatile, and glass offers a traditional appearance and excellent light transmission. The right choice depends on your budget, climate, structure, and long-term goals.
Final Thoughts: Build a Greenhouse That Works for You
Learning how to build a DIY greenhouse in four easy steps does not mean every project must look identical. The beauty of DIY construction is that you can adapt the idea to your garden, your budget, your climate, and your growing ambitions.
The four stages are straightforward: choose and prepare the right location, build a strong frame, install a suitable covering with proper ventilation, and organize the interior for productive growing. The more carefully you approach each step, the better your final greenhouse is likely to perform.
The most important thing is to avoid rushing. Measure twice before cutting, choose materials for the conditions they will face, provide reliable anchoring, and think about ventilation and drainage before the greenhouse is finished.
Explore different DIY greenhouse designs, but do not feel pressured to copy an expensive or complicated structure. A simple, well-built greenhouse can outperform a larger structure that has poor ventilation, weak foundations, or difficult access.
Your first greenhouse also does not need to be perfect. Start with a design you can confidently build and maintain. Then improve it over time. Add better shelving, irrigation, automatic ventilation, thermal improvements, or other features as your experience grows.
Most of all, build with the goal of creating a growing space you will actually enjoy using.
Whether you want an earlier start to the gardening season, a protected place for seedlings, a dedicated area for warm-loving crops, or simply a new weekend project, a homemade greenhouse can deliver years of value.
Ready to start your project? Choose your favorite DIY greenhouse designs today, measure your available space, create a realistic materials budget, and take the first step toward building a greenhouse that turns your gardening plans into something you can grow and enjoy.