A DIY greenhouse PVC structure is one of the simplest ways to create a protected growing space without building a heavy timber or metal greenhouse. The basic idea is straightforward: flexible PVC pipes form curved hoops, the hoops are anchored securely to the ground or a base frame, and greenhouse-grade polyethylene film is stretched over the structure.
Table of Contents
For a home gardener, this type of greenhouse can work well for seedlings, vegetables, herbs, strawberries, young plants, and season extension. It is especially useful when you want something larger than a small cold frame but do not need an expensive permanent glass greenhouse.
There is one important point to understand before building. A lightweight PVC greenhouse is not the same as a professionally engineered greenhouse. PVC hoops can work very well for small garden structures, but strong winds, heavy snow, poor anchoring, weak plastic, and inadequate bracing can damage them. The safest approach is to keep the design modest, anchor it properly, inspect it regularly, and strengthen it for your local weather.
PVC is a recognised material for small hoop structures. Utah State University Extension describes PVC pipe as one of the materials commonly used for low-tunnel hoops, while Oregon State University Extension provides a raised-bed cloche design that uses Schedule 40 PVC hoops with polyethylene covering.
This guide explains how to plan and build a practical PVC greenhouse in 9 steps, including the materials, frame, anchors, cover, door, ventilation, common mistakes, and maintenance.
Why Build a DIY Greenhouse PVC Structure?
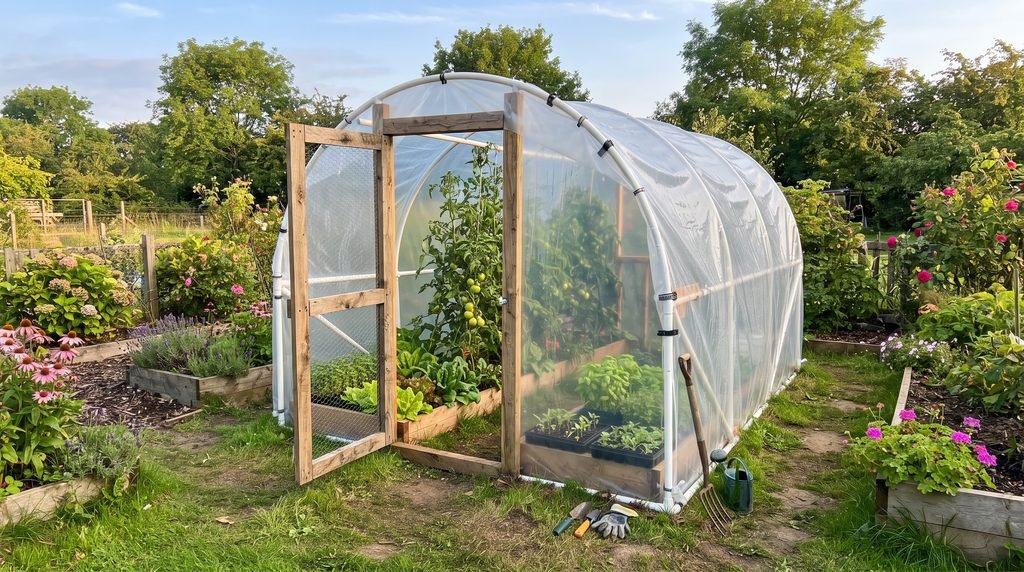
The main attraction of a PVC greenhouse is simplicity. Rigid plastic pipe can bend into smooth hoops without needing a pipe-bending machine, welding equipment, or advanced carpentry skills. For beginners, that makes the project much easier to understand.
PVC is also light enough for one or two people to handle. If the greenhouse is designed as a seasonal structure, it may also be easier to dismantle than a timber, aluminium, or steel greenhouse.
A covered hoop structure changes the growing environment by protecting plants from some wind and rain while capturing solar warmth. Depending on the crop and climate, this can help gardeners start plants earlier in spring or continue growing later into autumn.
However, do not assume that a simple plastic-covered tunnel will remain warm through every freezing night. Utah State University notes that low tunnels provide only limited temperature protection, and the result depends on the cover material and conditions.
A PVC greenhouse is therefore best viewed as a season-extension and weather-protection tool, not as a guaranteed frost-proof growing room.
What Type of PVC Should You Use for a Greenhouse?
For a small garden greenhouse, rigid PVC pressure pipe is usually a more sensible choice than very thin flexible tubing.
In the United States, many DIY plans use Schedule 40 PVC. Oregon State University’s cloche design, for example, uses ¾-inch Schedule 40 PVC for its hoops. Larger structures may benefit from a larger pipe diameter, closer hoop spacing, or additional bracing.
In the UK and other countries, pipe dimensions and classifications differ, so do not assume that a metric pipe with a similar outside diameter has exactly the same stiffness as US Schedule 40 pipe.
The required pipe size also depends on greenhouse width. The wider and taller the structure becomes, the more stress wind and snow can place on the hoops.
For a small garden tunnel, PVC is reasonable. For a large, exposed, year-round greenhouse in a windy or snowy area, galvanised steel or another engineered frame system is normally the more dependable direction.
PVC itself can also change after prolonged outdoor exposure. Utah State University notes that PVC and other plastic hoop materials degrade over time and may eventually need replacement. It suggests water-based latex paint as one way of extending PVC longevity.
Industry testing also indicates that sunlight exposure can cause surface discolouration and reduce PVC pipe’s impact strength, although other tested properties such as tensile strength and stiffness were not significantly affected in the cited study.
The practical lesson is simple: inspect old hoops rather than assuming PVC will last forever.
A Simple Beginner PVC Greenhouse Size
One practical starting size is approximately:
8 feet × 10 feet, or about 2.4 metres × 3 metres.
This is only an example, not a required dimension.
A greenhouse around this size provides enough room for narrow beds, containers, seed trays, or a small central path while keeping the PVC hoops short enough to brace reasonably well.
Very wide PVC structures require longer pipe and place more leverage on the anchors. Beginners are usually better off building a modest structure first.
The hoops can generally be positioned roughly every 2 to 3 feet, or around 60 to 90 cm, depending on pipe stiffness, greenhouse length, expected wind, and how much additional bracing is installed.
Do not treat hoop spacing as a universal structural specification. Oregon State University notes that hoop spacing can need adjustment for conditions such as prevailing wind, slopes, and windbreaks. More severe conditions may require additional hoops for structural integrity.
Materials You May Need
Exact quantities depend on your greenhouse dimensions, but a typical beginner project may require PVC pipe for the hoops, suitable connectors, ground stakes or another anchoring system, timber for a base if desired, greenhouse-grade polyethylene film, greenhouse film clips or battens, screws, door-frame timber, hinges, a latch, and materials for ridge and side bracing.
Useful tools include a tape measure, marker, drill/driver, saw, level, mallet, utility knife or scissors, spanner where required, and safety glasses.
If rebar or metal stakes are used as ground anchors, take care with exposed ends and check for underground services before driving anything into the soil.
The exact ground anchoring system should reflect your soil and weather. Loose sandy soil and a sheltered clay garden are not equivalent situations.
Choosing the Right Greenhouse Plastic
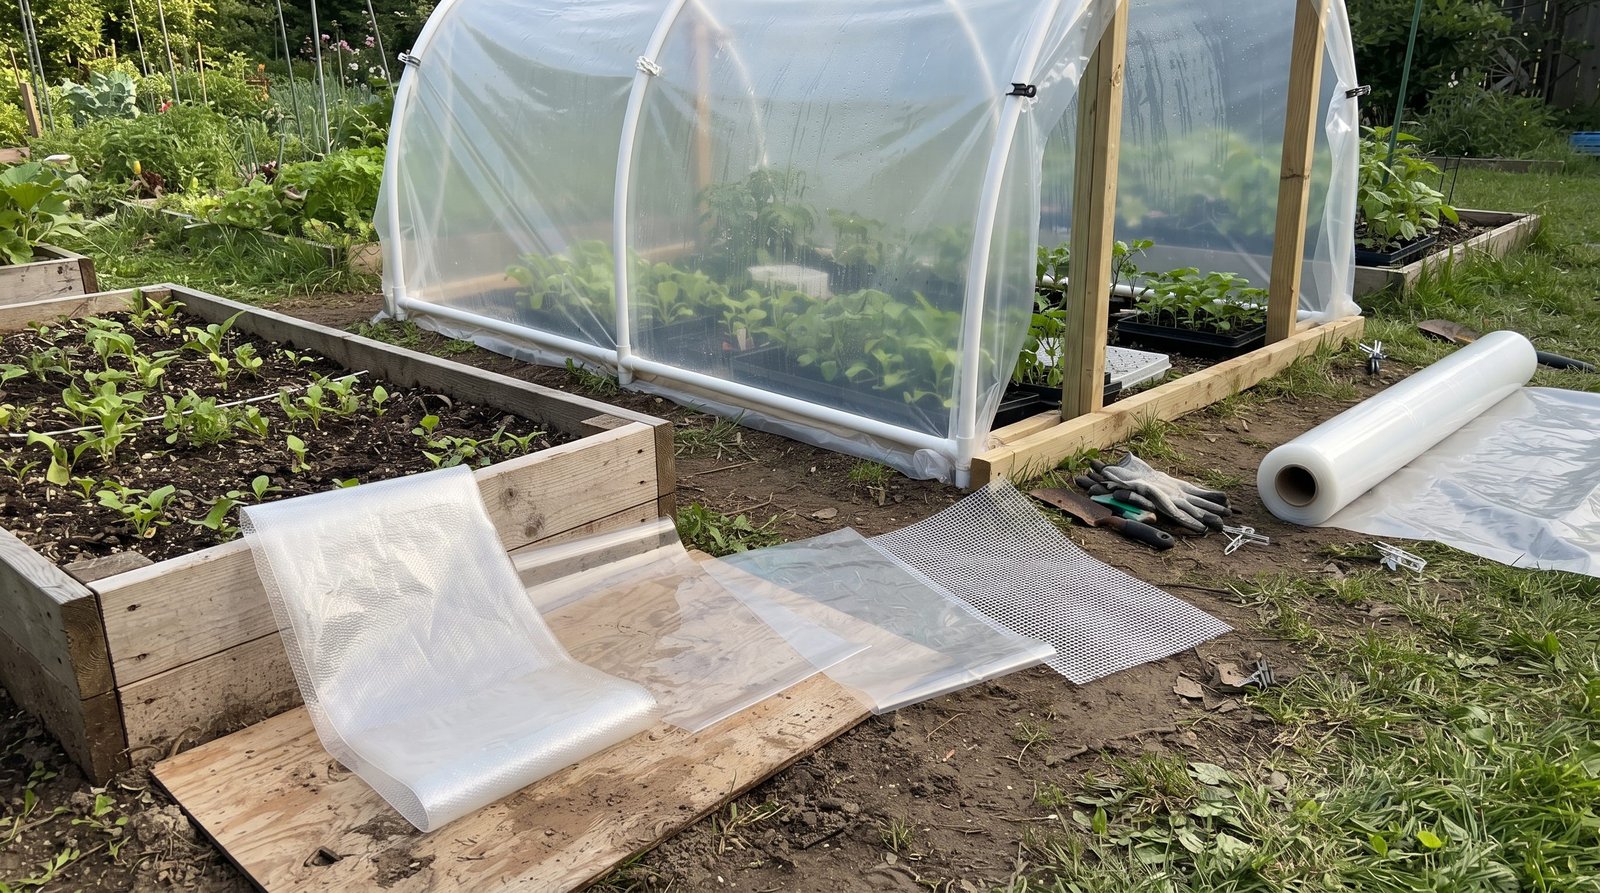
The cover matters just as much as the PVC frame.
Ordinary clear building plastic may appear cheaper, but it is not automatically suitable for long outdoor greenhouse use. Sunlight can cause untreated polyethylene to become brittle, cloudy, or damaged.
For a greenhouse that will remain outdoors, look for greenhouse-grade, UV-stabilised polyethylene film intended for horticultural use.
Six-mil film is common in greenhouse and high-tunnel construction. Penn State Extension notes that high tunnels are generally covered with a single layer of greenhouse-grade polyethylene film around six mil thick. Oregon State’s PVC cloche guide also specifies UV-treated six-mil clear polyethylene.
Oregon State explains that thicker 4- to 6-mil plastics generally offer greater durability than very thin low-tunnel films and that higher-grade materials may include UV protection.
Do not choose film based on thickness alone. Look at the manufacturer’s intended use, UV rating, warranty conditions, light transmission, film dimensions, and installation instructions.
Be Careful About Direct Contact Between PVC and Greenhouse Film
This detail is often overlooked in DIY tutorials.
Some greenhouse-film manufacturers specifically warn that their UV-stabilised polyethylene should not remain in direct contact with PVC pipe because the film may deteriorate prematurely at those contact points.
At the same time, university extension designs exist that use polyethylene coverings over PVC hoops. The safest approach is therefore to follow the instructions for the exact greenhouse film you purchase.
If its manufacturer says to isolate the film from PVC, use a compatible barrier.
Possible approaches include painting the PVC with an appropriate water-based latex coating or applying a non-PVC protective tape or other barrier approved by the film manufacturer.
Do not assume every paint, tape, foam, or coating is compatible with greenhouse film.
DIY Greenhouse PVC: 9 Easy Steps for Building the Frame
Step 1: Choose a Sunny, Well-Drained Location
Before buying pipe, decide where the greenhouse will stand.
Choose an area that receives good sunlight during the months when you expect to use the greenhouse. Avoid locations that remain heavily shaded by buildings, walls, evergreen trees, or large fences.
Drainage is equally important. A low area where rainwater collects can turn the greenhouse floor into mud and may create ongoing moisture problems.
Look at wind exposure as well.
An open hilltop or exposed garden can place far more stress on lightweight PVC hoops than a protected site. A natural or designed windbreak can be useful, but it should not create excessive shade.
Leave enough space around the greenhouse to repair the film, clear vegetation, inspect anchors, and reach the outside edges.
Before digging holes or driving long stakes, check for underground electricity, gas, irrigation, drainage, communications, or other services.
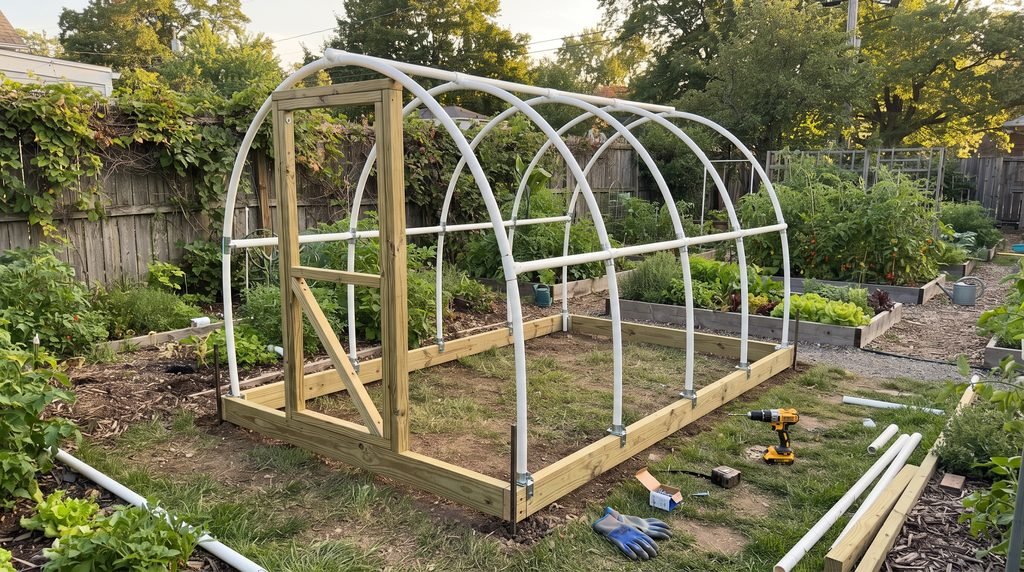
Step 2: Mark the Greenhouse and Build a Square Base
Measure the greenhouse footprint carefully.
For an 8 × 10-foot example, mark a rectangle measuring eight feet across and ten feet long.
Do not rely only on looking at the corners.
Measure the diagonals from one corner to the opposite corner. When both diagonal measurements match, the rectangle is square.
A timber base can make the structure easier to keep straight and gives you a solid surface for attaching end walls and the plastic cover. Use exterior-suitable timber and appropriate fixings if you choose this method.
A base frame is not compulsory for every hoop-house design. Some structures use ground posts and anchors instead. However, a rigid rectangular base often makes a small hobby build easier for beginners.
The frame should sit level enough that the door does not twist and the hoops remain aligned.
Step 3: Install Strong Ground Anchors
Poor anchoring is one of the biggest mistakes in lightweight greenhouse construction.
The cover acts like a large sail when the wind hits it. A beautifully built hoop frame can still shift or lift if only the plastic edges are holding it down.
Some small tunnel designs use rebar or metal posts driven into the ground, with the PVC hoop ends fitted over them.
The anchors need to be lined up so that each hoop crosses the greenhouse squarely.
Drive each pair at the same position along both sides of the greenhouse.
The required anchor depth depends on soil, wind, greenhouse size, and anchor design, so avoid relying on one fixed measurement for every site. Very soft ground may require a more substantial solution.
Oregon State’s low-tunnel guidance stresses the importance of sturdy end anchors and notes that site conditions can determine how much structural support a tunnel requires.
If your garden regularly experiences severe storms, consider purpose-made ground anchors or a stronger greenhouse frame instead of treating a simple rebar-and-PVC design as storm-proof.
Step 4: Bend and Install the PVC Hoops
Once the anchors are secure, fit one end of a PVC length over the first anchor.
Carefully bend the pipe across the greenhouse and fit the opposite end over the matching anchor.
Repeat the process down the length of the structure.
Stand back after installing each few hoops and look along the greenhouse. They should form a reasonably even tunnel rather than leaning in different directions.
Do not force PVC into an extremely tight curve. A wider greenhouse or steep arch may need longer pipe, larger pipe, different fittings, or another framing material.
If two pieces of PVC must be joined to create each arch, use connectors designed for the pipe and make sure the joint cannot easily pull apart under flexing.
Keep connector edges smooth because sharp projections can damage the cover.
Step 5: Add a Ridge Pole and Structural Bracing
Separate hoops can sway sideways.
A ridge purlin running along the top of the greenhouse connects the hoops and helps the frame act as one structure.
Position it along the centre line and secure it firmly to each hoop using an appropriate fastening system.
For better stability, side purlins can also run along the length of the greenhouse.
End-wall framing adds more stiffness.
Small PVC structures sometimes use PVC for the ridge, while others use timber or metal. The best choice depends on the structure and the way you intend to attach it.
The goal is to stop the hoops from behaving like independent flexible arches.
Bracing matters especially at both ends, where the door frame and end wall can be exposed to considerable wind pressure.
If you can push sideways on the completed bare frame and the entire structure moves easily, strengthen it before installing the plastic.
Step 6: Build the Door and End Walls
A greenhouse needs convenient access, but the doorway also affects structural strength.
A simple timber door frame is often easier for beginners than trying to construct everything from PVC.
Build a rectangular opening large enough for comfortable access, particularly if you plan to carry trays, compost, watering cans, or tools inside.
Brace the doorway so that it stays square.
Attach the door with suitable outdoor hinges and add a reliable latch.
The opposite end can be covered permanently or fitted with another door or vent.
A second opening can greatly improve airflow during hot weather.
Do not make the entrance unnecessarily narrow. A greenhouse becomes frustrating to use if every bag of compost or seed tray has to be turned sideways through the door.
Step 7: Prepare the PVC and Install the Greenhouse Film
Before covering the frame, inspect every surface that will touch the film.
Remove sharp screw ends, rough timber corners, exposed wire, burrs, or damaged fittings.
If your film manufacturer requires a barrier between the polyethylene and PVC, install it now.
Choose a relatively calm day for fitting the cover. Trying to handle a large sheet of greenhouse film in strong wind is difficult and can be dangerous.
Spread the film carefully and centre it over the frame.
Leave enough material at both ends and along the sides for secure fastening.
Do not cut away all the excess immediately.
Once the cover is properly positioned, begin securing it gradually. Alternate from one side to the other rather than completely fixing one side before touching the opposite side.
The plastic should be smooth and reasonably taut, but excessive tension can stress both the film and the frame.
Purpose-made greenhouse clips, wiggle-wire channels, compatible clamps, timber battens, or another film-retention system may be used depending on your frame.
Avoid fixings with sharp points pressing directly into the plastic.
Step 8: Secure the Plastic Against Wind
This is where a greenhouse goes from looking complete to actually being usable.
Loose greenhouse film flaps repeatedly in wind. That movement can wear the plastic at contact points and put additional loads on the structure.
Secure the long sides properly.
Some small tunnels use weighted edges. Others bury suitable film edges in soil, attach them to a timber base, or use dedicated greenhouse-film channels.
Utah State University notes that low-tunnel covers can be blown off and describes heavy objects or buried cover edges as methods used to hold small tunnels down.
The ends also need secure tension.
Oregon State recommends robust anchoring at tunnel ends so that the cover remains taut and stable.
Whatever method you choose, remember that holding the plastic down is not necessarily the same as anchoring the frame.
The greenhouse structure itself should have reliable ground anchoring.
After installation, inspect the cover from inside during daylight. Small punctures become easier to see when light shines through them.
Use repair tape designed for greenhouse film when appropriate instead of allowing a small tear to grow.
Step 9: Add Ventilation and Complete a Final Safety Check
A closed plastic greenhouse can become surprisingly hot when the sun appears, even if the outdoor air feels cool.
Oregon State University’s PVC cloche guide warns that its covered structure can become very warm on sunny days and recommends ventilation openings.
That makes ventilation essential rather than optional.
At minimum, a small greenhouse should have a door that can remain open safely when needed.
Better systems can include an opposite end vent, roll-up sides, louvres, or another adjustable opening.
Cross-ventilation allows hot air to leave while cooler outside air enters.
Do not assume you can close the greenhouse in spring and leave it untouched for days. Weather can change rapidly.
A simple min/max thermometer inside the greenhouse can help you understand how different conditions affect temperature.
Complete a final check of every hoop, anchor, brace, door fixing, clip, plastic edge, and fastener before placing valuable plants inside.
How Much Ventilation Does a PVC Greenhouse Need?
There is no single vent size that works for every DIY greenhouse.
Your ventilation needs depend on outside temperature, greenhouse size, sunlight, wind, plant density, crop type, and whether the sides can open.
The basic rule is that trapped heat must have somewhere to escape.
Opening only a tiny crack in one end may not move enough air through a warm tunnel.
Having openings at opposite ends creates a more useful airflow path.
Roll-up sides can be particularly effective on longer hoop houses because they create a large ventilation area.
Always secure open doors and side curtains so sudden gusts do not slam or tear them.
Ventilation also affects humidity. When moist air remains trapped for long periods, condensation can build inside the greenhouse.
Good airflow will not solve every plant-disease problem, but managing excessive heat and humidity creates a better growing environment than keeping the structure permanently sealed.
Should You Heat a DIY PVC Greenhouse?
You can use a PVC greenhouse without heating.
In fact, many basic hoop structures are intended mainly for passive season extension.
Sunlight warms the structure during the day, while the cover reduces exposure to wind and creates a protected microclimate.
At night, however, much of that stored warmth can be lost.
That means a PVC greenhouse should not automatically be treated as frost-free.
If you eventually add electricity or a heater, the project becomes more complicated because electrical equipment must be suitable for the damp greenhouse environment and installed safely according to local electrical requirements and manufacturer instructions.
For many beginners, a simpler first step is using the greenhouse for cool-season crops, seedlings at appropriate times, or extending the edges of the normal growing season.
What Can You Grow Inside a PVC Greenhouse?
The answer depends mainly on your local climate and season.
In spring, the greenhouse may be useful for seed trays and young plants once temperatures are suitable.
Later, it can provide shelter for crops such as tomatoes, peppers, cucumbers, herbs, or strawberries where local conditions suit those plants.
In autumn, it can help protect suitable crops from wind and cooling temperatures.
Cool-season vegetables may also benefit from protected growing conditions.
Remember that different plants have different temperature, humidity, pollination, and airflow requirements.
The greenhouse does not remove the need to understand the crop.
For example, crops that depend on insect pollination may require open doors, manual assistance, or another pollination strategy when flowers are enclosed.
Watering Inside a PVC Greenhouse
Rain will no longer water plants naturally once they are under solid polyethylene.
That sounds obvious, but it is easy for new greenhouse owners to underestimate how quickly covered beds and containers can dry.
Check soil rather than relying only on a fixed watering calendar.
Drip irrigation or soaker systems can make watering easier, especially during warm periods.
Try to deliver water close to the root area instead of unnecessarily soaking leaves every time you irrigate.
Ventilation and watering work together. Very wet soil combined with poor air movement can produce an excessively humid environment.
How to Make a DIY PVC Greenhouse Stronger
The easiest way to improve a small PVC greenhouse is usually not to make it bigger.
Instead, improve the details.
Add a strong ridge purlin.
Use more closely spaced hoops where conditions require them.
Brace the end walls.
Build a solid doorway.
Anchor the actual frame rather than depending only on the plastic.
Keep the cover properly tensioned.
Repair tears quickly.
Protect the structure from severe exposure where practical.
Inspect the frame after storms.
A PVC greenhouse is a system. Strong pipe attached to weak anchors still creates a weak greenhouse.
Similarly, excellent anchors cannot save a badly torn cover during severe weather.
Snow Is a Serious Limitation
A lightweight PVC greenhouse should never be assumed to carry heavy snow loads.
Wet snow can be extremely heavy, and accumulation creates downward pressure across the entire roof.
PVC hoops that perform adequately in mild weather may bend or collapse under conditions they were never designed to handle.
If significant snowfall is normal where you live, use a greenhouse system rated for your expected conditions or obtain appropriate structural advice.
Do not stand underneath a visibly overloaded greenhouse while trying to support or repair it.
PVC hoop houses are attractive because they are simple, but simplicity should not be confused with unlimited structural strength.
Strong Wind Can Damage Even a Small Greenhouse
Wind does more than push sideways.
It can create uplift and suction around the greenhouse cover.
That is why anchors, braces, film retention, closed doors, and tight plastic all matter.
A loose door can become another surface for the wind to catch.
A loose section of film can begin flapping and tearing.
A poorly anchored base can shift.
Before forecast severe weather, inspect the structure while conditions are still safe.
Do not attempt to hold or repair loose greenhouse film outdoors during dangerous wind.
Common DIY Greenhouse PVC Mistakes
Using Ordinary Plastic Instead of Greenhouse Film
One of the easiest ways to shorten the useful life of the project is covering it with whatever clear sheet happens to be cheapest.
Greenhouse film is designed specifically for outdoor horticultural use.
Choose the correct product instead of assuming all polyethylene sheets behave the same way.
Making the Greenhouse Too Large
A design that works beautifully at 8 feet wide cannot automatically be doubled to 16 feet using the same pipe, anchors, spacing, and bracing.
Loads increase as the greenhouse becomes larger.
Weak Anchoring
Lightweight does not mean the greenhouse can simply sit on the soil.
Anchor the frame.
No Ridge Support
A row of unsupported hoops can move independently.
Connecting the hoops makes the greenhouse much more coherent.
Ignoring Ventilation
A greenhouse designed to capture warmth must also have a way to release excess warmth.
This is one of the most important management tasks after the structure is complete.
Stretching the Film Too Tight
Smooth is good.
Extreme tension is not.
Leave enough flexibility for normal movement without leaving the film loose enough to flap heavily.
Leaving Sharp Edges Under the Plastic
A tiny exposed screw or rough corner can slowly cut through moving film.
Inspect the entire contact surface first.
Assuming PVC and Greenhouse Film Are Always Compatible
Check the covering manufacturer’s installation instructions.
Some film manufacturers specifically warn against direct PVC contact, so use the recommended barrier when required.
Ignoring Weather After the Build
A DIY greenhouse still needs inspection.
Look at anchors, film tension, tears, fasteners, doors, and frame condition throughout the season.
Maintaining Your PVC Greenhouse
A small amount of regular maintenance can prevent larger failures.
Walk around the greenhouse after strong weather.
Look for loosened film, damaged clips, leaning hoops, moving anchors, cracks, holes, or worn contact points.
Repair film damage promptly using a compatible greenhouse repair product.
Clean dirt from the covering carefully when needed so the greenhouse continues receiving useful light.
Never use aggressive chemicals simply because they clean ordinary household plastic. Check the greenhouse film manufacturer’s care instructions first.
Inspect exposed PVC as it ages.
UV exposure may cause visible surface changes, and older pipe should be replaced when it becomes damaged, unusually brittle, cracked, or unreliable.
At the end of the growing season, decide whether the structure will remain covered through winter.
In harsh climates, removing and storing the cover may reduce exposure, but that decision depends on the greenhouse design and the manufacturer’s recommendations.
Is PVC Better Than Wood or Metal for a DIY Greenhouse?
There is no single best material.
PVC makes sense when low weight, simple construction, curved hoops, and beginner-friendly assembly are priorities.
Timber can create strong straight walls and convenient door frames but is heavier and needs protection against weathering.
Galvanised steel hoops normally provide greater structural strength and are often a better choice for larger or more permanent tunnels.
Aluminium is light and corrosion-resistant but is usually associated with manufactured greenhouse framing systems rather than the cheapest DIY hoop-house approach.
Many successful small DIY greenhouses combine materials.
For example, you might use a timber rectangular base and end walls, PVC hoops for the curved roof, and greenhouse-grade polyethylene for the cover.
There is no rule saying the entire greenhouse must be made from one material.
Is a DIY PVC Greenhouse Worth Building?
For the right purpose, yes.
A small DIY greenhouse PVC project can be a practical introduction to protected gardening. It does not require advanced building skills, and the basic hoop structure is easy to understand.
Its limitations are equally important.
It is not automatically suitable for exposed sites, heavy snow, extreme wind, permanent year-round use, or large commercial spans.
The best results come from treating it as a modest, well-anchored garden structure rather than trying to make lightweight PVC perform like an engineered steel greenhouse.
A careful build with sensible dimensions, proper bracing, quality greenhouse film, adequate ventilation, and regular inspection can be much more useful than a larger greenhouse assembled too quickly.
Frequently Asked Questions About DIY Greenhouse PVC
What size PVC pipe is best for a DIY greenhouse?
There is no universal pipe diameter because greenhouse width, hoop spacing, wind, snow, pipe specification, and bracing all affect the required strength. Small extension-service designs have used Schedule 40 PVC, but larger greenhouses should not simply copy small-tunnel specifications.
Can I use normal clear plastic over PVC?
You can physically cover a frame with many types of plastic, but ordinary building plastic may not provide the UV resistance or outdoor lifespan expected from greenhouse-grade film. For a longer-lasting installation, choose UV-stabilised polyethylene intended for greenhouse use.
Can greenhouse plastic touch PVC pipe?
Check your film manufacturer’s instructions. Some greenhouse-film suppliers explicitly warn that direct PVC contact can reduce the film’s life. If the manufacturer requires separation, install a compatible paint, tape, felt, or other approved barrier.
How far apart should PVC greenhouse hoops be?
Spacing varies with the design and weather exposure. Small garden structures often use relatively close hoop spacing, but stronger wind may require additional hoops and bracing. Do not treat a single spacing measurement as suitable for every greenhouse.
Does a PVC greenhouse need ventilation?
Yes. Solar heating can raise temperatures rapidly inside a closed plastic structure. Doors, end vents, roll-up sides, or other adjustable openings allow excess heat and humidity to escape.
Conclusion: Build Small, Anchor Well, and Plan for the Weather
A DIY greenhouse PVC structure does not need to be complicated to be useful. A basic system of anchored PVC hoops, longitudinal bracing, strong end walls, greenhouse-grade polyethylene, and controlled ventilation can create an effective protected growing area for a home garden.
The key is paying attention to details that are easy to overlook.
Do not rely on weak anchors. Do not use unsuitable plastic simply because it is transparent. Do not ignore ventilation. Check whether your greenhouse film can rest directly against PVC. Most importantly, do not expect a lightweight DIY frame to withstand weather loads for which it was never designed.
Start with a manageable size, build the frame carefully, and observe how the greenhouse performs through your local seasons. Once you understand temperature, wind, watering, ventilation, and plant growth inside the structure, you will be in a much better position to expand or upgrade later.
If a simple protected growing area matches your gardening goals, measure your available space first, assess its wind and sunlight exposure, and use those measurements to create a materials list before purchasing the pipe and covering.